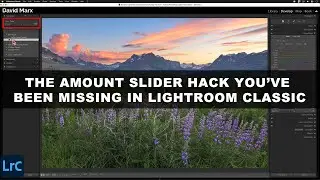
The AMOUNT SLIDER HACK That You've Been Missing In LIGHTROOM CLASSIC - (Color Editing Tips)
For photographers seeking to elevate their color editing in Adobe Photoshop Lightroom Classic, a hidden gem awaits – the Preset Amount Slider. Often overlooked, this powerful tool offers unparalleled control and flexibility, transforming color adjustments from a single-step process into a nuanced exploration of creative possibilities.
While commonly used with Masks and canned Presets, the Amount Slider’s hidden ability to refine global color adjustments is not obvious but it is easy to use. Imagine the ability to preview a spectrum of color variations before committing to a single edit. With a simple three-step workaround, the Amount Slider empowers you to do just that!
Harnessing the Power of the Amount Slider:
1. Apply your desired Global Color Adjustments: Utilize tools like the Color Mixer, Point Color, or the Color Grading Panel to first establish the desired shift in your image’s color direction. ( • How To Use POINT COLOR in Adobe Photo... )
2. Create a New Preset: Create a simple preset to transform your static color edit into a range of possibilities. Make sure that you enable the Support Amount Slider option when creating this preset. ( • DEVELOP PRESET Basics In Adobe Photos... )
3. Experiment: This slider offers precise control over the intensity of your applied effect. Dragging the slider left weakens the effect, while moving it right intensifies it. Watch in real-time as the color subtly shifts until you find the perfect intensity for your creative vision!
Why I Champion the Amount Slider (and Why You Should Too):
This simple editing hack empowers photographers with the ability to:
-Fine-tune Color Edits: Achieve the perfect balance and avoid over-editing by making subtle yet impactful adjustments.
-Explore Alternatives: Experiment with various intensities to discover unexpected color variations and unlock unique aesthetics.
-Make Informed Decisions: Compare different shades and intensities, allowing you to select the one that best complements the overall composition and narrative of your image.
By embracing the Amount Slider’s full potential, you unlock a world of creative possibilities. The next time that you delve into the world of color adjustments inside of Lightroom Classic, remember the secret power of the Preset Amount Slider!
Note: The Amount Slider’s availability is not universally present within Lightroom Classic. Tools like the Calibration Panel, the Lens Blur Panel, and Lens Correction do not currently support this option.
Hat Tip: The inspiration for this tutorial goes to the always creative Glyn Dewis. I believe in giving credit where credit is due and there are few Adobe Photoshop / Lightroom experts out there who consistently produce such fantastic content. ( • Lightroom COLOR GRADING HACK 💥 Adobe ... )
Chapters:
00:00 Introduction
00:16 The Amount Slider In Lightroom Classic
01:37 Creating A Temporary Preset
04:58 Amount Slider Editing
10:20 Conclusion
------------
Learn Adobe Photoshop Lightroom Classic, Adobe Lightroom (Cloud-Based) Adobe Lightroom for Mobile, or Snapseed from Google with our complete video training courses at http://www.focusphotoschool.com.
FocusPhotoSchool.com subscribers receive unlimited access to hundreds of in-depth video tutorials from Adobe Certified Lightroom / Photoshop Expert David Marx.
Visit our website today to take your photography to the next level!

![[AMV] верно, я Кира..](https://images.videosashka.com/watch/8-3v0E_Axvw)