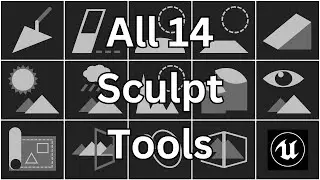
All 14 Landscape Sculpt Tools in Unreal Engine Explained in Under 3 Minutes
Want to learn Unreal Engine? Use the following link for a huge discount on a 10-hour Unreal Engine 5 Beginner's course: https://www.udemy.com/course/unreal-e...
Or, use the following link for a huge discount on a 19-hour Unreal Engine 5 Intermediate course: https://www.udemy.com/course/unreal-e...
In this video, I’m going to explain all 14 Landscape sculpt tools in Unreal Engine in under 3 minutes.
You can access the Sculpt Tools by going to Sculpt Mode within Landscape Mode. Sculpting a Landscape simply means to determine the elevation of the Landscape across its surface. A Landscape will start out completely flat, and then you can use the Sculpt Tools to raise or lower the elevation in various ways.
The Sculpt Tool is used to directly raise or lower entire areas of terrain at once. Left-clicking the mouse will raise the terrain and holding down the Shift key while left-clicking will lower the terrain.
The Erase Tool is used to return terrain back to its original height. So regardless of if the terrain has been raised or lowered, using the Erase Tool will cause the terrain in that area to gradually return to an elevation of zero.
The Smooth Tool is used to smooth out areas of the Landscape.
The Flatten Tool is used to create flat areas of terrain. The way it works is, whenever you click, whatever the height of the terrain is at the center of the Brush at that moment will be stored in memory. And then, as you drag the Brush around, the highlighted terrain will be either raised or lowered to match the height stored in memory.
The Ramp Tool is used to create ramps in the Landscape - terrain that is straight, but at an angle. With this tool, you left-click to create the first endpoint of the ramp, and then left-click again to create the second endpoint. You can then adjust the location of the endpoints, if necessary, and once you're satisfied, click the Add Ramp button to create a ramp between the two points.
The Erosion Tool is used to simulate all the different types of erosion that cause soil to slide downhill. In general, younger geological features will have less erosion and older geological features will have more erosion.
The Hydro Erosion Tool is used to simulate all erosion effects that are caused by water. This includes effects caused by both the initial rainfall, and also the subsequent flow of that water down the hillside.
The Noise Tool uses a random noise pattern to randomly raise or lower the height of the terrain.
The Retopologize Tool is used to even out areas where the vertices of the Landscape have been bunched together tightly in some places and spread thin in others. This can cause the Material of the Landscape to appear distorted, so using the Retopologize Tool will help this.
The Visibility Tool is used in conjunction with Landscape Hole Materials. Once you’ve configured your Landscape to use a Hole Material, you can use the Visibility Tool to carve out holes in the Landscape.
The Blueprint Tool is used with a plugin, the Landmass plugin. So if you have that enabled, then you can use the Blueprint Tool to construct Landscapes using custom brushes made with Blueprints.
The Mirror Tool is used to create a mirror image of existing terrain.
The Region Selection Tool is used to paint a mask onto specific areas of your Landscape to temporarily prevent those areas from being edited.
And then finally, the Copy/Paste Tool is used to copy and paste regions of terrain.