Textures - Unreal Engine 5: The Intermediate Course - Lecture 2
Want to learn Unreal Engine? Use the following link for a huge discount on a 10-hour Unreal Engine 5 Beginner's course: https://www.udemy.com/course/unreal-e...
Or, use the following link for a huge discount on a 19-hour Unreal Engine 5 Intermediate course: https://www.udemy.com/course/unreal-e...
A Texture, in Unreal Engine, can be defined as a two-dimensional image used to provide values to a Material input on a per-pixel basis. So what do I mean by this? Well, so far, I’ve been using Constants to define the Material inputs. For example, I defined a yellow color to use as my Base Color, and it made my entire Material that yellow color. I defined a value of 0 for the Roughness, and it made my entire Material smooth. But what if I didn’t want a uniform color or roughness? What if I wanted different parts of my Material to be different colors or to have varying degrees of roughness? This is where Textures come in. You can use a Texture to define a different float value for each individual pixel.
For example, if I go to the Textures folder in the Starter Content, I can view all of the Textures used by the Materials in the Starter Content. This first Texture is used to define the Base Color for a brick Material. This one is used to define the Roughness for that Material. And this one is used to define the Normal for the Material, which we will learn about soon in an upcoming lecture. These Textures use a naming convention, in which the suffix indicates the Texture’s intended use. The letter “D” stands for “Diffuse map” and is used to define the Base Color. The letter “M” stands for “Mask map” which could be used for various things, but for these Textures, is generally used to define the Roughness. And then the letter “N” stands for “Normal map” which is used to define the Normal.
Alright, so there are those Textures available for you to use, but you can also import your own Textures. Okay, so when you import an image, the Editor will automatically convert it to a Texture asset, which can then be used in the Material Editor. So all of these files here are now Texture assets. But this asterisk indicates that they are all still unsaved, so I’m going to go up to File and then select Save All.
Alright, so now I’m going to go back up to the Content folder and I’m going to create a new Material. And I’m going to name it “MyLogoMaterial” and then open it. Okay, so, to use a Texture asset in the Material Editor, you will need a Texture Sample node. To create a Texture Sample node, you can hold down the T key and left-click in the graph. Then, in the Details panel, you can set the Texture using the Texture property.
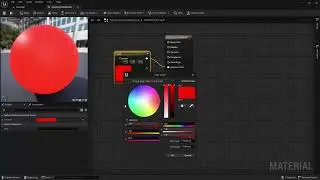
So with the Hue and Saturation set to zero, I’m only going to use this Value slider to adjust the color, which will only allow me to create black, white, or perfectly neutral grays. And I want you to notice what happens to the red, green, and blue values as this slider changes.
Alright, so now I want to quickly talk about a specific property on the Texture Sample node - the Sampler Source property. This property sets how the Engine will store and retrieve the texture used by the node. What is important to know, however, is that if all your Texture Sample nodes have this property set to the default, “From texture asset,” your Material will be limited to only 16 textures. Going beyond this amount will cause the Material to fail to render.
Alright, so now I’m going to close out the lecture by quickly talking about the resolution and file types of the images you use for your Textures.
Alright, so most graphics cards can’t process resolutions over 8192 pixels, or 8K, so 8192 x 8192 is the absolute largest you would ever want to make your textures, although in practice you probably shouldn’t ever go larger than 4096 x 4096, or 4K, due to current hardware limitations. And, of course, keep in mind that higher resolutions will result in better graphics, but has the trade-off of being more computationally expensive, and thus can potentially slow down your game depending on the hardware it’s being run on.
Alright, so when importing an image to use as a Texture, Unreal Engine will support the following file types. However, in practice, there are only two of these you should ever be using when designing your own Textures and those are Photoshop, which has a .psd extension and Targa which has a .tga extension. The reason is that the ideal file type for a Texture image is one that is both uncompressed and supports an alpha channel, and those are the only two file types from the list that satisfy both of those conditions.