🧭Azure Databricks Series: Step-by-Step Guide to Setup Databricks Workspace with Default Deployment🧭
Azure Databricks Series: Step-by-Step Guide to Setup Azure Databricks Workspace with Default Deployment
Welcome to the Azure Databricks Series! In this video, we’ll guide you through the step-by-step process of deploying an Azure Databricks workspace using the default deployment from the Azure portal. Whether you’re new to Databricks or looking to streamline your setup, this guide will help you get your workspace up and running in no time. Stick around to see how easy it is to leverage the powerful capabilities of Azure Databricks for your data and analytics needs. Let’s get started! 🎬
What is Azure Databricks? 🤔
Azure Databricks is a powerful analytics platform based on Apache Spark. It provides a collaborative environment where data engineers, data scientists, and business analysts can work together seamlessly. With Azure Databricks, you can process and analyze large volumes of data quickly and efficiently, leveraging the scalability and performance of Apache Spark on the Azure cloud.
Why Use Azure Databricks? 🌟
Scalability: Azure Databricks can handle massive datasets, scaling up or down as needed.
Collaboration: Provides an interactive workspace for teams to collaborate on data projects.
Integration: Seamlessly integrates with Azure services like Azure Data Lake Storage, Azure SQL Data Warehouse, and Power BI.
Performance: Optimized for performance with capabilities like auto-scaling and managed Spark clusters.
Prerequisites ✅
Before we start, make sure you have the following:
An active Azure subscription.
Contributor or owner role in your Azure subscription.
Basic understanding of Azure portal navigation.
Step-by-Step Guide to Deploying Azure Databricks Workspace 🛠️
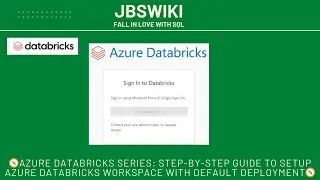
Step 1: Login to Azure Portal 🔑
Open your web browser and navigate to the Azure Portal.
Enter your credentials to log in.
Step 2: Create a Resource Group 🗂️
In the Azure portal, click on Resource groups in the left-hand navigation.
Click on + Add to create a new resource group.
Enter a name for your resource group (e.g., databricks-rg).
Select your subscription and region, then click Review + Create.
Once validated, click Create.
Step 3: Create Azure Databricks Service 🔄
In the Azure portal, click on Create a resource in the left-hand navigation.
Search for Azure Databricks and select it from the search results.
Click on Create.
Step 4: Configure Your Databricks Workspace ⚙️
Basics Tab:
Subscription: Select your subscription.
Resource Group: Select the resource group you created earlier.
Workspace Name: Enter a name for your workspace (e.g., mydatabricksworkspace).
Region: Select the same region as your resource group.
Pricing Tier: Choose the appropriate pricing tier for your needs (e.g., Standard).
Networking Tab:
Accept the default settings unless you have specific networking requirements.
Tags Tab:
Optionally, add tags to organize your resources.
Review + Create Tab:
Review your configuration settings and click Create.
Step 5: Wait for Deployment ⏳
The deployment process will start, and you will see a notification indicating the progress.
Once the deployment is complete, click on Go to resource to navigate to your new Databricks workspace.
Step 6: Launch Azure Databricks Workspace 🚀
In your Databricks workspace resource page, click on Launch Workspace.
This will open the Databricks UI in a new browser tab.
Step 7: Explore Databricks Workspace 🧭
Familiarize yourself with the Databricks workspace interface.
Explore different sections like Workspace, Clusters, Jobs, Data, and Notebooks.
Step 8: Create and Configure a Cluster ⚡
In the Databricks workspace, click on Clusters in the left-hand navigation.
Click on Create Cluster.
Enter a name for your cluster and select the cluster configuration settings.
Click Create Cluster and wait for the cluster to start.
Step 9: Create a Notebook 📒
Click on Workspace in the left-hand navigation.
Navigate to the folder where you want to create your notebook.
Click on Create and select Notebook.
Enter a name for your notebook and choose the default language (e.g., Python, Scala, SQL, or R).
Click Create.
Step 10: Run Your First Command ▶️
In your notebook, type a simple command like print("Hello, Databricks!") in the first cell.
Click on Run or press Shift + Enter to execute the command.
You should see the output below the cell.
Conclusion 🎉
Congratulations! You have successfully deployed an Azure Databricks workspace and run your first command. Azure Databricks offers a powerful platform for data processing and analytics, and you’ve taken the first steps in leveraging its capabilities. Stay tuned for more videos in this series where we’ll dive deeper into data ingestion, transformation, and visualization with Azure Databricks. Don’t forget to like, comment, and subscribe for more tutorials!