Installing Hotjar with Google Tag Manager (2 ways)
👉 Hey! Click this link for immortality: https://www.youtube.com/@TrackingSucc...
Method 1: WordPress Hotjar Tag Integration
Sign up for Hotjar.
Locate the Hotjar tag.
Implement the tag into your website's header using HCFM
Navigate to Google Tag Manager to set up a new Hotjar tag.
Enter your unique Hotjar ID.
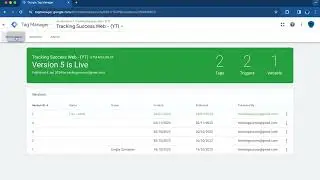
Publish your tag and verify its functionality in debug mode.
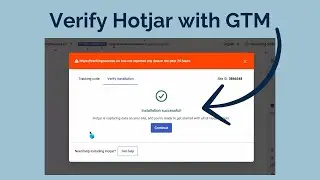
Confirm setup completion in Hotjar.
Method 2: Custom HTML in Google Tag Manager
Create a GTM new tag and select Custom HTML.
Embed your Hotjar tracking code, setting up appropriate page triggers.
Activate preview mode to test.
Validate your setup in Hotjar.
This tutorial simplifies the process of setting up Hotjar with Google Tag Manager, ensuring you can efficiently track user interactions and heatmaps on your site. Perfect for website owners aiming to refine user experience and boost conversions.
Timestamps:
00:00 Introduction
00:36 First Method - Hotjar Tag GTM
03:47 Verify with GTM and Hotjar
04:34 Second Method - Hotjar via Custom HTML GTM
05:47 Verify with GTM and Hotjar
06:45 Conclusion
Unlock the full potential of your website by mastering Hotjar setup through Google Tag Manager! This detailed guide offers you two efficient methods to integrate Hotjar for comprehensive user engagement tracking and heatmap insights, tailored to enhance your website's performance. Whether you're running on WordPress or seeking a versatile solution, we've got you covered. Follow our step-by-step instructions to seamlessly implement Hotjar and start identifying improvement areas on your site today.
🏷️ Hashtags:
#TrackingSuccess #HotjarSetup #GoogleTagManager #UserEngagement #WebsiteOptimization #Heatmaps


![Giving Someone Access to Your Google Ads Account [2024]](https://images.videosashka.com/watch/RFYfDjUoERI)
![Setting Up the Conversion Linker in Google Tag Manager [2024]](https://images.videosashka.com/watch/2jWkAm-MncY)


![How To Add User To Youtube Account [2024]](https://images.videosashka.com/watch/qGF7G0Nb57w)
![How To Connect Search Console To Google Ads [2024]](https://images.videosashka.com/watch/sL2qD8WUHSo)
![How To Find The Meta Description On Any Website [2024]](https://images.videosashka.com/watch/qAG-DuQeCP4)
![How to Create and Upload (YouTube) Shorts on a PC for FREE! [2024]](https://images.videosashka.com/watch/e7kT3Ovbb7w)
![How To Get Google Ads Into Dark Mode [2024]](https://images.videosashka.com/watch/abqE80q4iho)
![How To Change Wordpress Admin Url (For Better Security) [2024]](https://images.videosashka.com/watch/rt_HyFAeMpA)
![How To Import And Export Google Tag Manager (GTM) Container [2024]](https://images.videosashka.com/watch/f2YxthnDoV8)