How to Create a Font
на канале: Internet Services and Social Networks Tutorials from HowTech
Don't forget to check out our site http://howtech.tv/ for more free how-to videos!
/ ithowtovids - our feed
/ howtechtv - join us on facebook
https://plus.google.com/1034403827176... - our group in Google+
Step 1 -- Fontstruct
For example, you can log on to fontstruct.com which contains character models for over 20 different languages.
First of all, you would have to start with naming the font. After that, simply click on the "Start Fontstructing" button to move on with the process.
After that, the font editor graphical interface will open up. Below you have all the letters and characters appearing as different tabs over here. The idea is that each letter is created in a different tab. On the left side, you have the different styles of bricks to choose from.
Let's select one of the bricks and with the pen tool selected, let's draw a straight line consisting of three bricks. Now let's pick up the eraser tool from the tool bar, and all you have to do is make a selection and all the objects that will be erased will be highlighted in blue. Simply release the mouse and the bricks will be removed.
The line tool can also be used to draw straight lines. Over here, we will be using that tool to create the letter V. For that we will first draw a titled line followed by a straight line, both connected by a midpoint. Similarly, you can draw the other half of the letter as well.
Similarly, you also have to complete the small letters, numbers and the punctuation marks.
Once done, click on the Preview button by clicking on the button above. You will be shown all the letters that you have filled up. For demonstration purposes, we have only completed a few of the characters. On top, you have the real-time editor window where you can use the newly created font.
You can even choose to save and download the font.
The file will be downloaded in a zip format. So simply extract the zip file and install the font.
And now you can use any text editor, like Microsoft Word etc, and apply the font to the text.
Step 2 -- The Private Character Editor
For learning how to create a font, you must know all the tools that are at your disposal. For example, in the Windows operating system you have a built-in application called the 'Private Character Editor'.
The application is present in the Windows Folder. So let's open up my computer, move to the C drive and open up the Windows folder. From here, you need to move to the system32 folder and over here you will see the eudcedit.exe application, which is the private character editor application.
My Computer - C Drive - Windows - System32 - eudcedit.exe
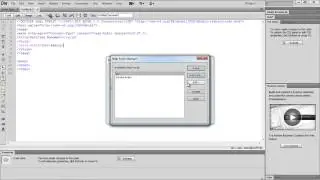
When the application is launched, you will first see the Select Code window. This window associates the character you are about to create with a particular position in the Windows character library.
The numbers are hexadecimal codes that will be allotted to your new character. Select any of the little grey boxes and click on OK.
The interface is basically a grid drawing area with the drawing toolbar on the left side. You can also access the drawing tools from the "˜Tools' menu and move over to the Item section.
You can use an existing character as a template to create a new character. Simply copy the existing character to the grid by moving to the Edit menu and clicking on the Copy Character option. From here, you can select the character you want to work on.
An existing character can also be used as a visual guide in a Reference window next to the Edit Grid. For that, you have to move to the Window menu and click on the Reference option. From here, you can select the character and it will appear in the reference window.
Each character that you draw becomes a black and white bitmap image. Let's show you what we mean by that. Let's pick up the rectangle tool, and use the use the left mouse button to draw in black over the letter C. Next, we will erase the excess part using the eraser tool below.
When finished with the new character, let's move to the edit menu and click on the Save Character As option. We can either associate the new character with a particular font family or with all fonts installed in your computer.
The character gets saved into the position chosen in the "Save Character As' window. To save into a different position, all you have to do is select a different cell from the grid.