How to Know Where a Photo Was Taken (View Exif Data)
на канале: Internet Services and Social Networks Tutorials from HowTech
This tutorial is going to how you how to find out where a photograph was taken.
Don't forget to check out our site http://howtech.tv/ for more free how-to videos!
/ ithowtovids - our feed
/ howtechtv - join us on facebook
https://plus.google.com/1034403827176... - our group in Google+
In this tutorial you are going to learn how to view exif data on a photograph which might allow you to see where the photograph was taken. It should be noted that currently only a limited number of high end camera record the gps location of a photograph. For this example we have a photograph taken on a Konica Minolta A2.
Step # 1 -- Choosing the Image
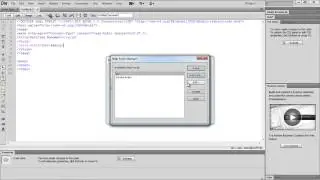
There are several programs that allow you to view exif data, but here we are going to use a website so we don't have to download a program. Go to the site "http://regex.info/exif.cgi" and you will see a very simple page load. Assuming that the photo is stored on your computer click "Choose File", find the image on your computer and click "Open".
Step # 2 -- Uploading the Image
Now click the "View Image from File" button and the image will start to upload. You can see the progress of this at the bottom of the screen -- this can take some time depending on the size of the image and the speed of your internet connection.
Step # 3 -- Viewing the exif Data
Once the upload has completed you will be taken to a page which will display the exif data. Much of this is interesting, but what we are interested in here is the "Location" field which tells us the exact location for where the photo was taken. If you don't see this field then the camera that took the photo did not record a gps location. If you click on the "Google" link, you will be taken to maps which will pinpoint the location for you. That is how to view exif data.

![[AMV] верно, я Кира..](https://images.videosashka.com/watch/8-3v0E_Axvw)