How to Set Up Your Draw-Tite Max-Frame Trailer Hitch Receiver on a 2013 Chevrolet Captiva Sport
Click for more info and reviews of this Draw-Tite Trailer Hitch:
https://www.etrailer.com/Trailer-Hitc...
https://www.etrailer.com
Don’t forget to subscribe!
/ etrailertv
Full transcript: https://www.etrailer.com/tv-install-t...
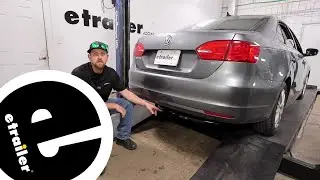
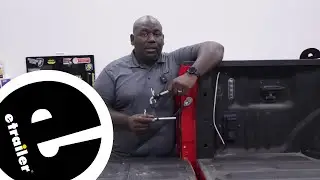
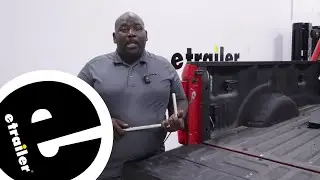
Today on our 2013 Chevrolet Captiva Sport we're going to be installing the Draw-Tite trailer hitch receiver, part number 75556. Now here's what our hitch looks like installed on our vehicle. Now we'll go ahead and give you a couple measurements in helping you choose some accessories for your hitch such as a ball mount, a bicycle rack, or a cargo carrier. From the center of the hitch pinhole to the outermost edge of the bumper is approximately 6-1/2". From the top of the opening in the receiver to the ground is approximately 15". Now before we begin our installation let's go ahead and go over the tools that we're going to be using today to install our hitch. We'll need a safety strap, little bit of spray lubricant, nylon tube brush, large pry bar, a ratchet to tighten down the hardware, an 18mm socket, and a torque wrench.
That's all you'll need to install your hitch on this vehicle. We're going to go ahead and begin our installation here underneath the vehicle by installing a safety strap to help support our exhaust so we can lower it down. Go ahead and put the safety strap in place. Now with our safety strap in place let's go ahead and point out the rubber exhaust hangers that we're going to need to remove in order to lower the exhaust down. There's a total of three rubber exhaust hangers. There's one here, there's one here, and the third one's over here on the passenger side.
Now in order to remove the rubber exhaust hangers we're going to use a little bit of spray lubricant and a large pry bar. We'll go ahead and repeat the same process at the other two exhaust hangers. Now with our three rubber exhaust hangers removed we'll go ahead and support the exhaust and use the safety strap to lower it down a little bit and give us some more working room. Next let's go ahead and point out our mounting locations that we'll be using to secure our hitch. There's a total of four mounting locations, two on each side. We'll go ahead and begin over here on the passenger side.
We'll be using this location here, as well as here. It will be a mirror image over on the driver side for the mounting locations. Next it's a good idea to take a little bit of spray lubricant and a nylon tube brush to clean out the mounting location threads. The tube brush that we're going to be using today is part number 814092. As the vehicle gets older you will get more road grime and dirt that builds up in the threads of the mounting locations, so it may take you a little bit longer to clean them out.
We'll go ahead and repeat this same process at all four mounting locations. Now that we have our mounting locations cleaned out let's go ahead and go over the hardware that we'll be using to secure the hitch. It will be the same at all four mounting locations. We'll be using a 12mm hex bolt and a 1/2" conical tooth washer, making sure that the teeth face towards the hitch when installed. It's also a good idea before you put the hitch up to thread in the hardware to make sure that the threads are nice and clean. If the hardware doesn't thread in easily you will need to continue to clean the threads out. Now it's good idea to get an extra set of hands to help you raise the hitch up into position as you install the hardware. Now with all of our hardware loosely installed we'll go ahead and tighten everything down and then torque it to the manufacturer's specification. Now that all the hardware has been torqued down, now we can go ahead and reinstall our rubber exhaust hangers. Now with the rubber exhaust hangers back into place we can go ahead and remove our safety strap. With that, that will do it for the installation of the Draw-Tite trailer hitch, part number 75556, as installed on our 2013 Chevrolet Captiva Sport. .