etrailer | A Closer Look at the Peterson Clearance and Side Marker Trailer Light Kit
Click for more info and reviews of this Peterson Trailer Lights:
https://www.etrailer.com/Trailer-Ligh...
Check out some similar Trailer Lights options:
https://www.etrailer.com/dept-pg-Trai...
https://www.etrailer.com
Don’t forget to subscribe!
/ etrailertv
Full transcript: https://www.etrailer.com/tv-review-pe...
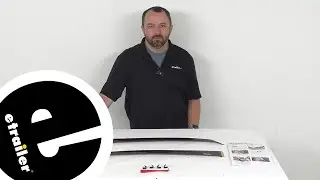
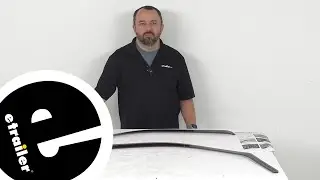
Hi everyone. Aiden here with Etrailer. Today we're gonna be taking a look at and later be showing you how to install this Peterson Clearance and Side Marker trailer light. It's gonna be just a simple incandescent light, but if you've got incandescent on your trailer already and you want it to match, this could be a good option for you. Let's check it out. Now, generally I like to just recommend people go the LED route because they're gonna be longer lasting and much more energy efficient and typically brighter, but these incandescent lights are putting out a pretty good amount of light, especially compared to what was already on our trailer.
So if you already had this style and you wanted it to match, then you could keep going this route. But the thing I like about this kit is that the black base that it gives you here makes the light really easy to swap. So down the road, if you did wanna make the switch to LEDs, this kit could still be a good option for you. The bulb is rated for 15,000 hours of light, but should something happen, say like the lens cracks or one of the bulbs just has a failure and it did need to replace it, it's pretty easy to do. The base has these black tab on either end that we can just pry at until it releases, and you can pull the lights straight out.
This unit is going to be sealed and water resistant, so if it is around water, you'll be all right. And the base here, in my opinion, is the real star of the show because that two pin setup makes installation of the light really easy or swapping of the light. It's not going to include mounting hardware, so you will have to either reuse old mounting hardware when you switch to this or provide your own new hardware. The mounting holes will be three inches apart, center on center, and they'll utilize one of those screws as a ground when mounting. So the single wire system, just splicing into power on your trailer.
But if you're curious to see what the installation of this kit looks like, just follow along and we'll show you how we got it installed on this trailer. It's gonna start off just by us removing that old light using something like a trim panel tool to unclip the light from the base. This can be a little tricky sometimes if it's been on there for a while, but once we get that pop loose, you can kind of pull some of the wiring out to give us a little bit more slack, and we've got two different screws holding this in, so I'll undo the base first with my square bit that I have on one side. (drill running) And then just pop that bit out for the screw on the other side. (drill running) With all that undone though, I wanna just take a look at the back of my light and I can see that the red wire going into the light is on the positive side, so that's my power wire and the flat ground wire we're not gonna need anymore since our new base just grounds by screwing into the trailer.
So I'll just make sure I remember that and I'm gonna cut those wires both loose, leaving myself a fair amount of slack to work with. I'll strip back the end on my power wire here, and I'm gonna just tape off and put the black wire just into the trailer where I'll disconnect my old ground. Since this wire isn't needed anymore, you can really approach this however you want to. If you wanted to just go in and disconnect the ground, you could. If you wanted to just leave this taped up, you could do that too. It's just gonna mean a little bit more wire mess left inside the trailer. We'll just pop that in. I'll take care of that later. And for our wire, we can just twist the ends together here, and we can attach our butt connector. We're gonna do that with our smaller heat shrink butt connector here. That way the connection is nice and watertight. Feed that end in, crimp it on, and just quickly tug on it to make sure that we got a nice firm connection. The new base we're using today has a bullet connector on the end, but we don't need that, we're just gonna be utilizing that butt connector, so I'll clip it off and strip the end back. Patchy wire end into the butt connector there, and crimping it down, same as we did before. And we'll just apply a bit of heat to shrink down that connection, and it's gonna help us shrink this down so we can fit it back through the hole that's already on our trailer for our wiring to pass through. Put that shrunk down. It's a lot easier for me to just route this into the trailer
