Add ivy to your scenes using tyFlow
Generate Ivy in an artistic way using tyFlow.
tyFlow is the greatest thing that was added to 3Ds Max lately, this plugin can do almost anything particles simulations, cloth simulations, physics collisions, Ivy growth, actors, VDB and recently even terrains and much more.
It also ships with 25+ 3Ds Max modifiers that will add more functionality to help you in your day to day modeling process, some of these modifiers are based on the native 3Ds Max modifiers with added functionality, my personal favorite tySelect I can’t imagine working without it anymore!!
In this short tutorial you’ll learn one of the simplest and very useful applications to tyFlow, creating ivy to your scenes in a very artist friendly method.
There is two versions available tyFlow Pro and tyFlow free, you can use the free version to start learning this great plugin it can do everything that Pro version do with only a few limitations, free version doesn’t support tyCache export and no multithreading and Gpu acceleration, which will make simulations slower but it’s still fast unless you’re working with very big setups, even if you don’t work with simulations the tymodifiers are a must to have.
Follow the steps shown in this tutorial:
create tyFlow object, go to modifiers tab and open the editor
Right click on the editor canvas go to presets flow and select simple ivy flow preset for a starting point
Disable Shape and Display operators in Event_001 and enable spline path operator by clicking on the icon on the left
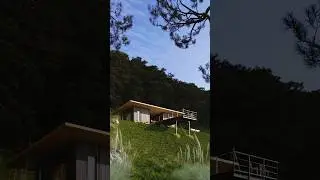
Select the grow operator, navigate to surface growth, delete the default ivysphere and add your objects you want the ivy to grow on (in this example the wall)
Move the tyIcon close to the wall (you should start to see the ivy growing on the wall)
Navigate in the grow operator to Ivy rollout and increase age to have a bigger ivy
Go to shape operator in Event_002 and select Leaves(Ivy), scroll down to mesh rollout and choose reference option and pick your leaf model to change the leaves to your custom ones
Check scale option to change the scale of the leaves and you can add variations in the size (in this example set scale to 40% and variations to 35%)
Now apply the leaves material to the tyFlow object
Notes for more control over the final results:
Feel free to experiment with the age value to have different results (in this case set it to 500)
Increasing the branching max depth value will increase branches over growth time which will result in a denser ivy (be careful with this value, don’t go too high it will make the ivy very heavy generally the default value works fine)
adjust the leaves density to have more or less leaves
moving the tyIcon will change where the starting point of the ivy
You can increase the birth value to have multiple roots to grow more ivy’s (be careful with this value, don’t go too high it will make the ivy very heavy)
Subscribe to learn 3Ds Max in simple short form tutorials : @BoundlessBox