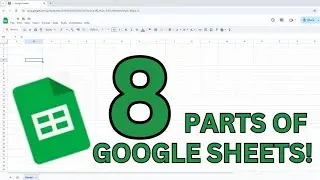
What are the 8 Different Parts of Google Sheets?
What are the different parts of Google Sheets?
Once you have opened Google Sheets, you'll see a blank grid with various elements to help you create and manage your spreadsheet. Here’s a breakdown of the key parts of Google Sheets:
Title Bar: At the top of the screen, you’ll find the title of your spreadsheet. By default, it’s labeled as “Untitled spreadsheet.” You can click on the title to rename it to something more descriptive. I’ll name this Google Sheet “Inventory” Now you will see that you can star the file, move the file or view the document status. Below the title bar is the
Menu Bar which contains options like "File," "Edit," "View," "Insert," "Format," Tools, Extensions, and Help. Each menu has dropdown options that give you access to different tools and features, such as saving your spreadsheet, adding charts, or changing formatting options. Each of these menus we’ll discuss in other videos but when we open the file menu you can see ways to make a new workbook, open another Google Sheets, Import data, and Make a copy of the current file. The next section allows you to share, email, and download the Google Sheet. The third section helps you rename, move, add a shortcut, and delete the file. Finishing at the bottom of the file menu are file details, Settings and Print.
The Editing menu provides the means to undo and redo recent changes to the google sheet, cut, copy, paste, delete and find and replace. The view menu offers different ways to see the worksheet while you work on it. The insert menu allows you to insert cells, rows, columns, and sheets as well as other sophisticated Google Sheets elements. The format menu includes options to format data in the cells and more advanced features. And the data menu provides more advanced ways to create meaningful information in Google Sheets.
Directly below the menu bar is the toolbar, which provides quick access to commonly used functions. You’ll find buttons for undo, redo, print, font selection, formatting text (bold, italic, font size, etc.), changing cell background colors, aligning text, adding borders, and inserting functions like SUM or AVERAGE. The toolbar is a fast way to make changes without navigating through the menus above.
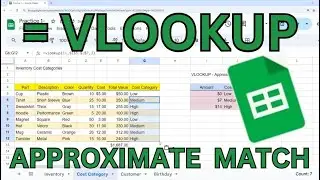
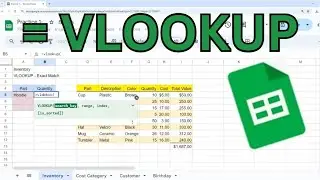
Just below the toolbar is the formula bar, where you can see and edit the contents of the currently selected cell. If you’re entering a formula (e.g., =SUM(A1:a10)), you’ll type it in here. It’s useful for reviewing formulas or lengthy text without having to open the cell directly.
Next is the grid with columns, rows, and cells but below the grid are
At the bottom of the page, you'll find the sheet tabs. A workbook can contain multiple sheets, and the tabs allow you to switch between them. You can rename, add, or delete sheets using the small dropdown arrow next to each tab. This is especially helpful when organizing data across different sections of a project, such as having a separate sheet for each month or department.
On the top-right corner of the screen is the "Share" button. This allows you to invite others to view or edit your sheet. You can control the level of access (view only, comment, or full editing rights) and share via email or a direct link.
music by creatormix.com