FFVII REMAKE Walkthrough Chapter 5: Dogged Pursuit (PS5 4K 60FPS) No Talking FF7R Playthrough
Final Fantasy VII REMAKE Walkthrough Chapter 5: Dogged Pursuit
Upon boarding the train, Shinra announces heightened security measures in response to the Avalanche threat. Following an initial ID check, interact with Tifa and then proceed to check on Barret, who Cloud calms after a tense confrontation with a Shinra middle manager. While moving through the train, you can spot Healing Materia.
Most of the foes in this chapter are vulnerable to Lightning and Fire, with some being weak to Ice. Equip Lightning, Fire, and Ice Materia as needed. After sorting out the situation, return to the previous train car with Tifa, but be prepared for an emergency ID scan. Face Slug-Ray enemies before reuniting with Barret and Tifa.
Leaving the train, you encounter more Slug-Rays. Dispatch them using the Triple Slash technique and Focused Thrust, taking advantage of their weakness to Lightning. Nearby, a vending machine and a bench allow you to restore HP and MP.
As you venture in the opposite direction, open a white door on your left to access a storage room filled with Shinra boxes. Progress through the tunnel, ascend a small platform to obtain 2 Hi-Potions from a chest, and continue onward, keeping an eye out for trains.
After dealing with Slug-Ray and Security Officer enemies, you'll spot Barret on the other side of a wall. Cross a staircase to reunite with Barret and fight more Security Officers and Slug-Rays.
Opt for the white door on your right to reach a storage room with Shinra boxes and an Elixir. Proceed further to find a flight of stairs on your left, leading to Wererats guarding Shinra boxes and a chest containing a Star Pendant, granting Poison immunity.
As you progress, confront enemies including an Elite Grenadier, Guard Dogs, and Slug-Rays. Use Fire, Thunder, and abilities like Triple Slash to take them down. Open a white door on your right for another storage room with Shinra boxes and a chest containing an Ether.
Upon ascending the tunnel, take a left to follow the graffiti art mentioned by Barret. Encounter Wererats and Shinra boxes, and before descending the next set of stairs, open a chest to obtain 2 Antidotes.
Before proceeding down the stairs, make sure to equip Ice Materia. Face a new enemy, the Grashtrike, which is vulnerable to Blizzard spells. Eliminate them in groups to minimize their resilience when isolated or at low health.
Don't forget to grab 2 Hi-Potions from a chest on the right side of a platform before dealing with more Grashtrikes and a Queen Grashtrike, which requires coordinated teamwork due to its abilities. Employ Blizzard spells, Focused Thrust, and limit breaks to defeat them.
A vending machine and a blue bench before ascending the stairs offer an opportunity to rest, stock up, and equip Fire Materia.
Purchase Poison Materia for 1500 gil from the vending machine. Cross the stairs, descend to the other side, and confront several Security Officers and a Flametrooper. The Flametrooper is weak against fire but resistant to melee damage. Use Fire or Fira spells and attack its fuel tank to deal significant damage.
After dealing with the Shinra operatives, head to the left and join Barret and Tifa behind the storage container to assess security. Face two Flametroopers and two Sentry Launchers, with the Flametroopers being weak against Fire and back attacks. Focus on eliminating the Flametroopers first, as the Sentries are immobile.
Upon defeating the foes, head to the left stairs, ascend, and go through the doors to discover Lightning Materia, a vending machine, and a blue bench for resting. The vending machine also sells music disc #28.
Climb the stairs, eliminate Elite Security Officers, exit through the other door, and move forward. Slide down a ladder at the end to reach the ground floor and destroy Shinra boxes in the area.
Make sure your team is fully healed and equipped with Lightning Materia before approaching Stamp, as it triggers the Crab Warden boss encounter.
Facing the Crab Warden
Focus on dismantling the Crab Warden's legs using Thunder and melee attacks while avoiding area damage from flamethrower and electrical attacks. When the Warden is staggered, concentrate your attacks on the Generator, which is its weak point. Take cover behind storage crates and instruct your party members to focus on the same leg you're targeting.
After achieving the second Stagger, move on to Phase 3 and target the Left and Right Auxiliary Weaponry using Thunder damage. Crippling one of these parts exposes the Pilot, and crippling the Pilot exposes the Generator. Utilize Thunder to deal with both and complete the battle to obtain Tifa's Metal Knuckles.
Receiving Tifa's Metal Knuckles
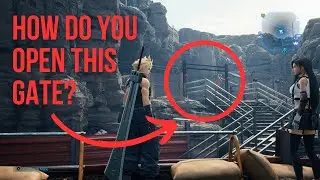
Your victory against the Crab Warden earns you Tifa's new weapon: the Metal Knuckles. Follow Barret, proceed to the left, slide down a ladder, and enter the Service Tunnel. Navigate until you reach an elevator, activate the switch to open the gate, and board the elevator, concluding Chapter 5.