Revit Electrical Lighting BIM Modeling //How to link Lighting CAD
For training & BIM MODELING Work contact me on WhatsApp +918921751895
https://www.bimlane.com/
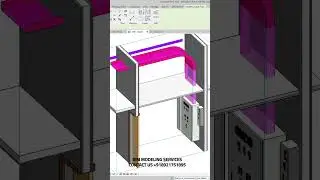
Providing MEP BIM MODELING SERVICES
BIMLANE is a leading BIM MEP solutions provider, specializing in Building Information Modeling for efficient and precise mechanical, electrical, and plumbing systems. We streamline construction workflows, enhance collaboration, and drive innovation in the AEC industry.
Join this channel to get access to perks:
/ @autocadrevitbyju
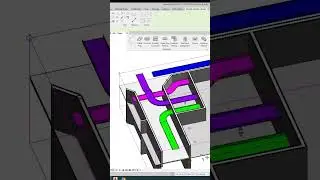
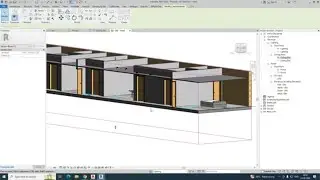
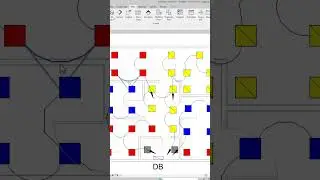
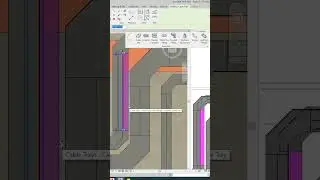
Linking a lighting CAD file in Revit and creating lighting elements involves several steps. Here’s a step-by-step guide to help you through the process:
Step 1: Prepare the CAD File
Clean Up the CAD File: Ensure that the CAD file only contains the necessary elements (like lighting fixtures) to avoid clutter.
Layer Management: Make sure that the lighting elements are on distinct layers to make it easier to manage them in Revit.
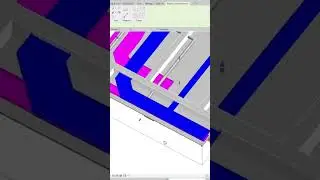
Step 2: Link the CAD File in Revit
Open Revit: Open your Revit project or create a new one.
Link CAD File:
Go to the Insert tab.
Click on Link CAD.
Browse to the location of your CAD file, select it, and click Open.
In the Import CAD Formats dialog box, choose the appropriate options for positioning, colors, layers, and units.
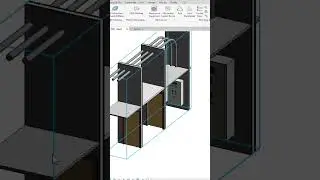
Step 3: Create Lighting Fixtures in Revit
Go to the Relevant View: Switch to the view where you want to place the lighting fixtures, typically a floor plan or ceiling plan.
Load Lighting Families:
Go to the Insert tab.
Click on Load Family.
Browse to the folder containing lighting fixture families, select the required fixtures, and click Open.
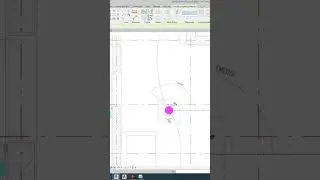
Place Lighting Fixtures:
Go to the Architecture or Systems tab (depending on your version of Revit).
Click on Component and then select Place a Component.
Choose the appropriate lighting fixture from the loaded families.
Place the fixtures in the desired locations according to the CAD file reference.
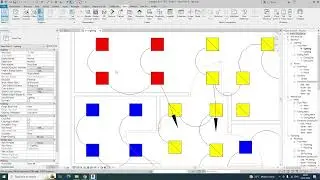
Step 4: Adjust and Align Fixtures
Use Snaps and Align Tools: Use the Snaps feature to accurately place the fixtures in alignment with the CAD file.
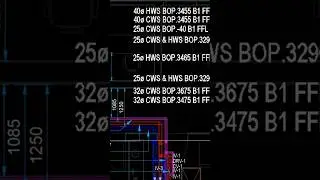
Adjust Elevation and Orientation: Set the correct elevation for ceiling-mounted fixtures and adjust the orientation as needed.
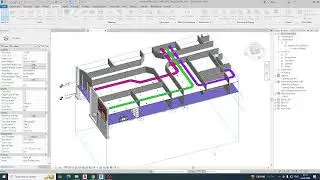
Step 5: Manage and Hide CAD File Layers
Manage Layers:
Go to the Manage tab.
Click on Object Styles and adjust the visibility of the imported CAD file layers as needed.
Hide Unnecessary Layers: Use the Visibility/Graphics (VG) settings to hide layers of the CAD file that you don't need to see.
Step 6: Final Adjustments
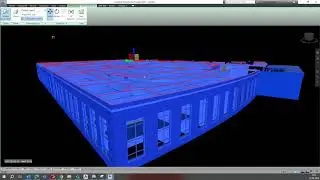
Lighting Analysis: Perform a lighting analysis if necessary to ensure proper lighting levels.
Rendering: Use Revit’s rendering tools to visualize the lighting and ensure it meets your design requirements.
By following these steps, you can effectively link a lighting CAD file in Revit and create accurate lighting fixtures within your project.
• REVIT Electrical Equipment & Small Po...
• Electrical Cable Tray Modelling in Re...
• Revit Electrical Question & Answers ...
• Revit Electrical Project Setup For Sm...
• Revit Electrical Project Setup For Be...
• Revit Electrical Project Setup For Li...
• Power Circuiting & Creating Panel Sch...
• Small Power Shop Drawings In Revit Me...
For training & Work contact me on WhatsApp +918921751895