Installing and Using PyCharm on Linux
Created and recorded by Yiming Cai. September 2021
PyCharm is a very important IDE. If you used Android Studio, Visual C++ or IntelliJ for debugging before but never used any python IDE, PyCharm will be the best IDE for you to start.
In this video, I will show you how to install PyCharm in your Linux system. Also, I will show you some very useful functions of PyCharm.
Install PyCharm in Ubuntu above 16.04 is easy, all you will need is to type the command:
sudo snap install pycharm-community --classic
The --classic option is required because the PyCharm snap requires full access to the system, like a traditionally packaged application.
You can change the command pycharm-community to other pycharm versions you prefer, and then, type the password of your computer, the installation is pretty much done.
The command to run PyCharm if you install it by snap is pycharm-community. Of course, if you install the educational edition or professional edition, plese change your command to the edition you installed.
Sometimes, after installation, you type the pycharm-community but nothing occurs, or an error says “pycharm-community” command not found. This may occur if it’s your first time install pycharm on a computer you are using. All you need to do is reboot your computer, and then you can run your pycharm by command.
If you have used visual studio or android studio, once you open pycharm you will found the interface is pretty familiar. And yes, they have a lot of functions in common.
For those who never used similar IDE before, I will briefly introduce some functions you are most likely to use during your python project.
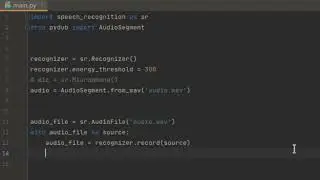
To open a existing python project, simply just click file-open, and then you just need to look into the path of your file and open it. Any file that contains a python file, can be open and compiled here.
To create a new project, click file-new project. You can modify your file name, the path of your file, and change the environment you will use.
After open or create a new python project, you will see a button on the left called “project”. Click it, you will be able to see all files in your project.
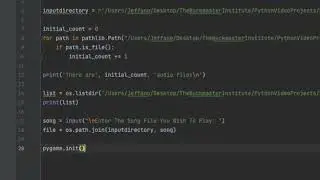
To config your python code, you can find “add configuration”, press add new or plus sign, choose python option, name your configuration and add script path, also your parameters if you need. Click the play button to run, and the debug button to enter the debug mode. In debug mode, you can simply click and add a breakpoint in your code, so the configuration will automatically stop in the breakpoint. Press F8 or F7, you will be able to run your code line by line and monitor the variable change of your project.
Another most used function is the version control system. Click the VCS on the top, enable your version control system, you will have a local git repository. With the git repository, you can commit and push once you modify your code with comments, if you want to go back to the previous version of your project, you can either choose to return it by open your git log or right click your python files and find the local history to reverse your version. Also, you can link your local repository to GitHub or GitLab, then you can work with your team member remotely.


![Jonathan Monsheny - Quand j'y pense | PrésenCiel Studio [LIVESHOW]](https://images.videosashka.com/watch/pMhnLu2Dvos)

![[FREE] Trap Type Beat -](https://images.videosashka.com/watch/vGw9Z9n8E40)


