Complete Guide to Keyframing in Adobe Premiere Pro using Automation Blocks
download Automation Blocks for Premiere Pro at https://aescripts.com/automation-bloc...
0:00 Animate In & Out
1:15 Ball Bounce Animation
1:45 Scale Bump Animation
2:22 Remote Interview Tools
2:32 Removing Keyframes
3:02 Ken Burns Pan & Zoom
3:14 Wiggle Animation
3:42 Creating Custom In-Out-Animation Tools
Save Time: Time is precious, and so is your creative energy! Automation Blocks lets you breeze through complex animations in no time, giving you more room to focus on your story and bring your vision to life!
Transcript:
Automation Blocks for Premiere Pro comes with a collection of key framing tools, which create frequently needed animations in one click.
Let's select some clips in our timeline and run the tool "Elastic Scale In Out", for example.
The clips now animate in and out nicely. Technically, Automation Blocks created keyframes here in the effect controls to create the animation. In the inputs panel of Automation Blocks, you can tweak the animation. You can choose the duration, which is 0.5 seconds by default, choose if you want to animate in, out or both and if existing keys on the animated properties should be removed or not. Usually it is a good idea to keep this option enabled unless you have other animations of the clip, which should be combined with the new animation.
This particular tool also has an option to add rotation. If we enable it and run the tool again, the result looks like this.
If you want a more subtle animation, you can use the tool "Fade In Out Opacity Subtle Scale". As you can see, the clips now fade in, but compared to a basic opacity fade, the fade-in looks more refined and elegant because it is combined with a slight zoom.
If you want it even more basic, use this variant, which is just a basic opacity fade without any zoom.
Next let's take a look at a very special animation: The ball bounce!
This animation just animated layers in and not out. It actually runs a physics simulation to create a physically correct motion path. If you choose a higher value for "Elasticity", the bounces become higher and the animation becomes longer.
If we set the "Move to the side" parameter to -400 and run the tool again, it moves 400 pixels to the left while bouncing. For positive numbers, it would move to the right instead.
The tools in the "at Current Time" section do not animate clips in or out, but insert an animation at the current time instead. Let's move the current time indicator here, and with this clip selected apply the "Scale Bump at Current Time". The resulting animation looks like this.
These kinds of animations are great to control the viewers focus. It is as if the question mark would should "hey, look at me, I am important right now".
By the way, all scaling animations always scale around the anchor point, which is currently located at this dot, here. You can move the anchor point to other locations, to create variations of the effect.
The tools for remote interviews allow to toggle quickly between a small and a large clip which are shown side by side. We cover those in detail in a separate tutorial.
If you want to get rid of keyframes animations for whatever reason, you can use one of the tools in the "Remove" section. The first one removes all keyframes only from the properties
position
scale
rotation
anchor point and
opacity
here in the "Motion" section of the clip. You can also disable those individually, if you just want to clear the keyframes of some of those properties.
The second tool really clears all keyframes from the selected clips. In addition to the transform properties, this includes keyframes on effects, for example.
Finally, the tools in the "Add Motion" section generate a motion over the entire duration of the selected clips. The "Ken Burns Pan & Zoom Tool" is great to add motion to slideshows and is covered in detail in a separate tutorial. The Wiggle tool moves the selected layers in a random way.
Let's select those layers and first apply a wiggle with 1 wiggle per second and an amount of 100px. The result looks like this.
To make it even more interesting, we overlay the wiggle with a second one which is much faster with 10 wiggles per second but also much smaller, with just 5 pixels. The result looks a little bit more complex, and combines the slow and the fast wiggle nicely.
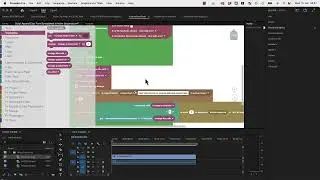
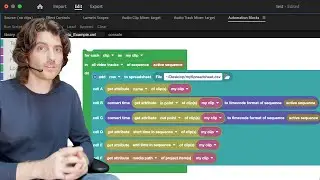
Let's take a quick look at the block code of the "Fade In Out Opacity" tool such that you get an idea how to modify the tools and to create your own variants.
Here, at the very top of the code, you can set the default values for the inputs. So if you love long fades, you can set the default duration to 1.5 seconds, for example.
If you expand this block, you can see the details of the code.
We first retrieve a list of all selected clips and show a warning, of this list is empty, or in other words if no clip is selected.


