Batch Replace Clips, Texts, Colors & more in Pr with a Spreadsheet
download Automation Blocks for Premiere Pro at https://aescripts.com/automation-bloc...
Ready to supercharge your video editing workflow in Adobe Premiere Pro? In this tutorial, we'll show you how to effortlessly batch replace clips, texts, colors, and other properties using a spreadsheet and the powerful Automation Blocks extension for Premiere Pro.
Transcript:
If you want to create many variants of a video and need to replace clips, texts, colors and other effect parameters for this, then the workflow I show in this tutorial is for you.
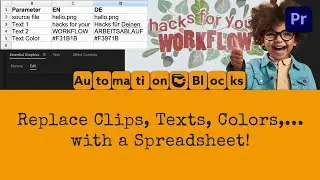
With the help of Automation Blocks you can quickly setup a spreadsheet which lists the properties you want to modify. Then you can simply modify the spreadsheet and import all changes to Premiere Pro in one click.
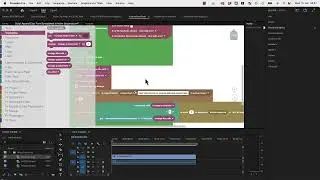
For this workflow, we need the tools you find in the Automation Blocks Library in the category "Templates-Clip Property Spreadsheet".
First we select the tool "Export Properties of Selected Clips to Spreadsheet". Now in the active sequence we select the clips, which we plan to modify and choose here the location where the spreadsheet file should be saved. Make sure to enter .csv as file format at the end of the file name.
Now we run the tool and then we can open the generated spreadsheet file in Open Office, Excel, Apple Numbers, Google Docs or whichever spreadsheet application you want.
The spreadsheet contains all parameters of the exported clips, which can be modified and our first job is to find the ones we actually want to modify.
The first column contains the name of the clip, so here are all parameters of "woman.png", which is this clip in video track 1. And then follow all parameters of "Rustic Fall Title", which is this motion graphics template here in video track 2.
The second and third column contain the actual parameters of the clip and the value they currently have. So for images and videos, the actual file path of the image or video is a parameter for example. Here you can see that woman.png is actually a file in the folder "template files" on my desktop.
And I have a file "melon.png" in the same folder, so I can just edit the path here, if I want to replace the footage.
The other parameters of woman.png are the ones you find in the effect controls. So you could change the opacity, position or scale, for example. If you applied effects to your clip, the effect controls would be listed here, too.
For checkboxes, like "Uniform Scale", you need to enter true or false as value. For Position, Anchor point or other 2D values, you can see that the value are two numbers in square brackets. The first one is the X value and the second one the Y value. What might be a little confusing about those, is that they are given as numbers between 0 and 1. So for X values, 0 is the left edge of the sequence and 1 is the right edge. And 0.5 is exactly in the center of the sequence. That's why the current position is 0,5 for both X and Y.
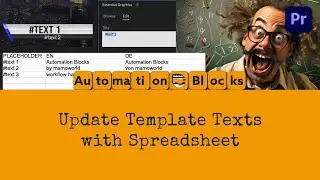
For Motion Graphics Templates, you also have all these "Graphic Parameters". These are the controls of the template, which you also see in the Essential Graphics Panel.
You can see that some entries control nonsense values, and you should just ignore those. But you can also see that the spreadsheet contains the actual texts, the color controls and checkboxes, like the Background On/Off here, for example. Which controls you have, of course depends on the actual template.
Now let's delete everything, except the parameters we actually want to modify. We want to modify the source file of woman.png and we want to change the two texts of the template, as well as the text color.
Let's set the text to
"Hacks for your"
"Workflow"
And for the color, note that it is written as hex code. If you open a color picker, you can pick a color and then simply copy the hex code of the color from here.
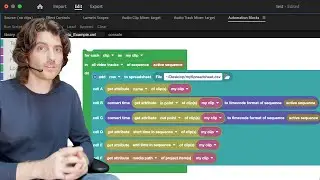
Let's also take a look at the last column off the spreadsheet. This tells Automation Blocks, where exactly it finds the parameters in your project.
So this means "In the sequence with name "Main Sequence" in videotrack 1 the first clip, for example. So make sure to do not delete or change this accidentally, because otherwise Automation Blocks does not know anymore, where to find the parameters in your project.
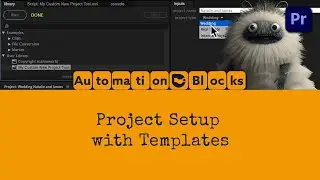
Now let's save the spreadsheet, open the tool to import properties and then in the inputs panel we choose the modified spreadsheet file.
If we now run the tool, all properties contained in the spreadsheet are updated instantly in the Premiere Pro project. You can see that the texts and text color changed and also the image of the woman has been replaced by the melon image.
By the way, when replacing footage, Automation Blocks does the same as if you would right-click on a project item and choose "Replace Footage". So the footage changed to the melon file, but the project item name and also the clip name in the sequence are not changed.
Let's drag a second copy of the project item into the sequence, then in the spr