eLinkSmart Wireless Camera - Setup & Review
Purchase Link
https://amzn.to/2Dm6mG0
Audio Description
The e link smart wireless camera comes well packed in this cardboard box.
Nothing too fancy on the box, But it does have a tiny tick mark on the 1.3 mega pixel checkbox.
I wish they had sent me the 2MP version, assuming there is one because it has the option on the box.
Having said that, 1.3 million pixels is plenty for what necessarily is a live streaming camera running 24 hours a day.
Hold on to the box. because you are going to need it in a bit.
inside the box we have the instructions manual, but you don’t need that. that’s why your are watching this video
lots of Styrofoam in there to protect the contents.
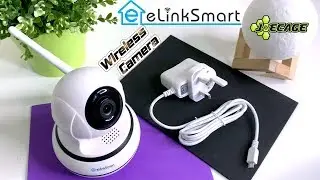
we have the micro usb wall adapter in matching white to the camera, then we have the camera itself, but we will get to that in a second.
we have a tiny pouch with a tiny screwdriver, a couple of screws and a couple of plastic wall pegs.
There is also a bracket that could be mounted on the wall using the provided screws. Once this is done, you can latch the camera onto the bracket like so.
you can plug in the micro usb cable to power the camera on, I am just going to pull this one out of my speaker and plug it in.
And oh, there is a RJ45 port for your ethernet cable if you want to have a wired connection, there is a micro sd card slot for local storage and there is also a 2.4 GHz wifi antena on the back just next to the micro usb power port.
On the bottom, we have a tripod mount and also the rest button concealed in that tiny hole.
Now lets set it up. This is where the box comes to use again. There is a QR code on the box that will direct you to the app on the app store.
Scan it from your phone, follow the link and download the app.
Once the app is installed, open it and register as a new user.
You should now be able to login using your new credentials.
select ‘add new camera’, then select PTZ camera. (it stands for Pan, tilt and zoom).
Now we will have to connect the camera to the network.
you can do this by directly connecting the camera using an ethernet cable or by using your phone to connect it directly to the wifi network.
Select the QR code configuration option and the app will now guide you through the set up process.
First it asks me to make sure the the power cable is connected. Then push the reset switch for 3 seconds.
luckily , the screw drive that comes in the box, fits perfectly into the reset switch.
The camera will now make a buzzing noise for a couple of seconds, it will turn around a little bit and then will make this tune once the reset is complete.
Hit on next and it will ask you for your wifi password, enter this.
Now you will be presented with a QR code on the app. point this code at the camera.
you will hear a loud beep from the camera acknowledging that it has seen the qr code.
Now hit next, it will make some retro dialup noises and tell you that the set up process is complete.
you can now view the camera’s stream from anywhere in the world using your phone.
Lets go though the different features of the app.
you can pan and tilt the camera remotely using the joystick like this.
you can set it to continiuous 360 degree rotation loop by tapping on the 360 button once. to deactivate, tap on it again.
the same can be done on a 90 degree angle along the tilt axis.
Tapping the speaker button, will mute and unmute the audio from the camera
Hitting the camera button takes a photo and saves it to your phone’s album.
The micro phone button is to transmit audio from the phone to the camera. So this supports two way audio .
Hitting on the video camera icon will start and stop video recording. This will again be saved to your phone’s local photo album.
The last icon can be used to change the resolution or quality of the recordings.
Lets set it to the highest resolution which is 1080p full HD and see if it is any better.
well, there is a very marginal improvement, you may might as well leave it at this setting.
hitting the square at the bottom of the streaming image will expand the video to landscape for a full screen view.
though the joystick is not visible now, you can touch and drag on the display to move the camera around.
hitting on the location icon near the joystick will save the orientation of the camera for quick access to that position in future.
for instance if i set the camera’s current position to ‘home’ and then rotate it to face the wall and name that position ‘wall’. I can access these position with just a tap of a button.


