Tutorial – How to install ComfyUI and ComfyUI Manager
Timestamps:
0:00 [Intro] Scope of the tutorial and brief intro to ComfyUI
0:25 [GitHub] We will be following the instructions but making sure to install dependencies in a Python Virtual Environment (venv)
0:49 [PowerShell] Cloning into the ComfyUI repository and changing into directory with [cd]
1:29 [PowerShell] Creating a Python Virtual Environment and activating it
3:11 [PowerShell] Installing PyTorch in the virtual environment
3:43 [PowerShell] Installing the rest of the dependencies in the virtual environment
4:34 [Notepad] Creating a batch file to automatically activate the virtual environment before starting the program
5:47 [Command Prompt] Starting the ComfyUI interface via the created batch file
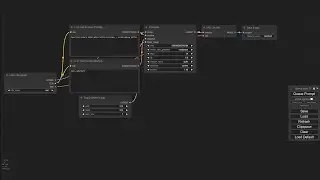
6:05 [ComfyUI] Brief introduction to the default set of nodes
6:27 [Sublime Text] Referencing model checkpoints and other resources from a separately installed Stable Diffusion UI
8:46 [ComfyUI] Starting ComfyUI with models from separate installation properly referenced
8:57 [ComfyUI] Setting up nodes for one test image generation, and generating
9:41 [ComfyUI] Installing ComfyUI Manager to install and manage extensions
11:06 [ComfyUI] Installing the extension Extended Save Image for ComfyUI with ComfyUI manager
11:31 [ComfyUI] Adding a Save Image Extended node to the workflow, to be able to save the generated image as JPEG
.........................................
Links:
Previous tutorial on Automatic1111, showing how to install Git and Python:
• Tutorial – How to use Stable Diffusio...
Git:
https://git-scm.com/download/win
Python 3.10.6:
https://www.python.org/downloads/rele...
ComfyUI:
https://github.com/comfyanonymous/Com...
ComfyUI Manager:
https://github.com/ltdrdata/ComfyUI-M...
Extended Save Image for ComfyUI:
https://github.com/palant/extended-sa...
.........................................
It is assumed that you already have Git and Python 3.10.6 installed.
If this is not the case, watch the previous tutorial (top link) if needed.
.........................................
PowerShell commands relevant for installing ComfyUI dependencies in a Python Virtual Environment:
git clone https://github.com/comfyanonymous/Com...
cd ComfyUI
python -m venv venv
venv\Scripts\Activate.ps1
Then you may continue with installing the dependencies as per the original installation instructions.
.........................................
Batch file contents for activating the venv before starting ComfyUI:
call venv\Scripts\activate.bat
python main.py
.........................................
Location of YAML file to define path to separately installed models (change file extension to .yaml):
ComfyUI\extra_model_paths.yaml.example
.........................................
Hardware requirements:
NVIDIA dedicated GPU with minimum 6 GB of VRAM
.........................................
This tutorial demonstrates to KTH Architecture students how to install the ComfyUI web user interface for Stable Diffusion – a node-based UI offering more flexibility than Automatic1111 and similar web user interfaces – and briefly covers the generation of images with the installed software.
The operating system used for this tutorial is Windows 10. Running another operating system (e.g. Linux, MacOS) might amount to a different user experience or software incompatibility.
If you want to check in which computer room(s) any relevant software might be installed in – CADLAB, DFL, and ARCPLAN are in the KTH School of Architecture building – please check the following link for current status:
https://www.kth.se/en/student/it/camp...
Disclaimer:
This tutorial aims to increase student awareness of the versatility of the digital tools available for use within the context of the architectural education offered by KTH. As such, it might not be generally applicable, but on the other hand, if at least one architecture student is helped by it in fulfilling deliverables requirements or being taught something of genuine interest, the purpose of this tutorial is satisfactorily achieved. There might be inaccuracies in this tutorial – if you identify any significant one, please tell us in the comments.



![Tutorial – How to find the best free Digital Elevation Model for use in QGIS as a heightmap [GLO-30]](https://images.videosashka.com/watch/nHV8sW2BUhQ)


