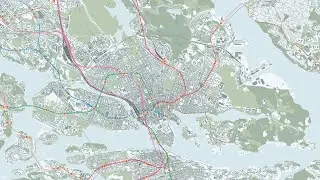
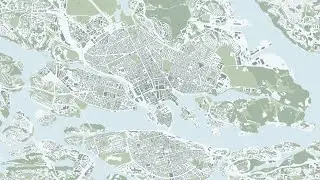
Tutorial – How to use OpenStreetMap data in QGIS (including extracting a subset/crop)
Map data attribution:
OpenStreetMap – openstreetmap.org/copyright
.........................................
Timestamps:
0:00 [Intro] Scope of the tutorial and OpenStreetMap attribution requirement notice
0:15 [GEOFABRIK] Downloading a national subset of the OpenStreetMapData
0:37 [FOSSGIS] Downloading a water polygon layer separately, derived from OSM coastlines
1:01 [Osmconvert] Downloading a small program to extract a cropped subset of the downloaded data
1:46 [QGIS] Setting up a new QGIS project, and adding a suitable crop layer
3:23 [Osmconvert] Using the extents of the crop layer to make a cropped subset of the OSM data
4:40 [PowerShell] Using PowerShell with Osmconvert to make a slightly larger subset
6:10 [QGIS] Adding the water polygon layer, creating a spatial index, and clipping it
7:02 [QGIS] Importing the larger cropped subset of OSM
7:58 [QGIS] Importing the smaller cropped subset of OSM
9:48 [QGIS] Filtering a layer to render only a specific polygon
12:26 [QGIS] Manually adding the last piece of the water surface puzzle
13:52 [QGIS] Classifying a layer based on category, to toggle the visibility of endeavoured items
14:18 [QGIS] Adding a polygon layer for the landmass
14:55 [QGIS] Repeating the classified category process for bridges and other man-made objects
15:33 [QGIS] Rendering closed polylines as surfaces with Geometry Generator
16:30 [QGIS] Repeating the classified category process for natural entities, leisure areas, land use, and buildings
18:02 [QGIS] Using the larger subset to add some border entities which were cut off from the smaller subset
18:32 [QGIS] Changing the appearance of a layer
20:14 [QGIS] Timelapse of repeating the changing of appearance for the other layers
20:47 [QGIS] Setting up a layout for exporting, adjusting paper size, margins, scale and positioning
21:50 [QGIS] Exporting the map as a PDF
22:04 [Google Chrome] Evaluating the result
.........................................
Links:
OpenStreetMap:
https://www.openstreetmap.org/#map=13...
OpenStreetMap attribution guidelines:
https://osmfoundation.org/wiki/Licenc...
Secondary sources for subset of data:
https://wiki.openstreetmap.org/wiki/P...
GEOFABRIK:
https://download.geofabrik.de/
Water polygons by FOSSGIS:
https://osmdata.openstreetmap.de/data...
Osmconvert wiki with download link:
https://wiki.openstreetmap.org/wiki/O...
QGIS:
https://qgis.org/en/site/
.........................................
PowerShell command example for Osmconvert:
.\osmconvert64.exe sweden-latest.osm.pbf -b="17.46,58.79,18.66,59.98" --out-pbf -o="sweden-latest.osm_02.pbf"
.........................................
Hexadecimal values for colour scheme chosen for this tutorial:
Water – d9e8ef
Landmass and bridges – f2f6f8
Open green areas – bdcab2
Forested areas – a7b8a5
Wetlands – a5b8ad
Buildings – 909d9a
.........................................
This tutorial demonstrates to KTH Architecture students how to use the freely available OpenStreetMap GIS data in QGIS, to create a custom map, where the only restriction is that you will have to attribute the OpenStreetMap project when publishing your map.
The tutorial also covers the extracting of a smaller subset of the data, with the help of a small program called Osmconvert.
The operating system used for this tutorial is Windows 10. Running another operating system (e.g. Linux, MacOS) might amount to a different user experience or software incompatibility.
If you want to check in which computer room(s) any relevant software might be installed in – CADLAB, DFL, and ARCPLAN are in the KTH School of Architecture building – please check the following link for current status:
https://www.kth.se/en/student/it/camp...
Disclaimer:
This tutorial aims to increase student awareness of the versatility of the digital tools available for use within the context of the architectural education offered by KTH. As such, it might not be generally applicable, but on the other hand, if at least one architecture student is helped by it in fulfilling deliverables requirements or being taught something of genuine interest, the purpose of this tutorial is satisfactorily achieved. There might be inaccuracies in this tutorial – if you identify any significant one, please tell us in the comments.




![Tutorial – How to find the best free Digital Elevation Model for use in QGIS as a heightmap [GLO-30]](https://images.videosashka.com/watch/nHV8sW2BUhQ)
