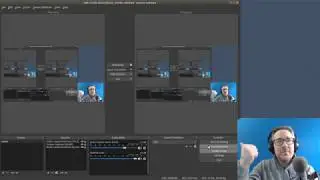
11 - Blender Video Editing (Importing Images [ Overlay / Resize / Rotate ])
Scroll Down for Video "Time Index" (************)
----------------------------------------------------
Learn to Video Edit with Blender
----------------------------------------------------
My 2.7x Blender Series: https://goo.gl/Wfja4y
My 2.6x Blender Series: https://goo.gl/p8j7D2
----------------------------------------------------
All My Latest Content in 1 place
----------------------------------------------------
http://mikeycal.com/content_channels
-----------------------------------------
Connect and Support Me
----------------------------------------
All Social Media: http://mikeycal.com/contact_me
Paypal Donations: https://goo.gl/822L6f
All Support Options: http://mikeycal.com/support
----------------------
Affiliate Links
----------------------
Sit/Stand Desk, Flexispot products: https://goo.gl/VZ6gGB
$10 coupon code: influenceraff-meyers-10dollar
#############
Video Description
#############
I show you how to import images with transparent and non-transparent background. I then show you how to fix the image proportions, alpha blend over the other strips, resize, and rotate the images.
Download "Gimp", to create your own images with transparent backgrounds, here: http://www.gimp.org/
(************)
TIME INDEX:
------------------
00:00 - Previous video review
00:17 - Today's video intro
00:30 - Import our first image. (Non-transparent)
00:50 - use box zoom to zoom in on small strip.
1:30 - images that are imported fill the entire frame
1:53 - use Image offset to fix proportions
2:12 - move the image around.
2:37 - set Blend to "Over Drop"
3:04 - let import the transparent image now.
3:30 - use blend setting of "Alpha Over"
4:00 - transforming image
4:16 - always hide original strip.
4:36 - set blend setting to Alpha Over
4:48 - the Scale and Rotation settings.
WORK AROUND: Importing images that are larger than the preview window...
You may have noticed that images that are larger than the preview window are automatically cropped.
You have to resize your images to be no bigger than the preview resolution.
The good news is, if you you have a large amount of photos, you can use a free program called "Image Magick"
( http://www.imagemagick.org/ ) to resize an entire folder of images with one command:
mogrify.exe -geometry 1920x1080 c:/path/to/images/*.png
Basically, this will shrink the images proportionately and set the Maximum geometry to 1920 x 1080 pixels.
For example, this command converted my 4320 x 3240 images to 1440 x 1080.
(Note this command will overwrite the images. So make a copy of the folder, and mogrify those images.)
Credits
----------
Big Buck Bunny
(c) copyright 2008, Blender Foundation / www.bigbuckbunny.org
"Big Buck Bunny" uses the Creative Commons License:
http://creativecommons.org/licenses/b...

