Blender 2.8 Video Editing (Setup Startup Defaults)
See the full Blender 2.8 Video Editing Playlist:
• Blender 2.8 Video Editing (Setup Star...
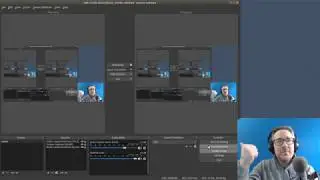
Configuring Blender 2.8 startup defaults for Video Editing.
It's important to note that you can always just use the Video Editing Template -- as is -- instead of reconfiguring the Default template to be the video editor. Switching the Default template to video editor is really a personal preference, but following this video will also demonstrate some of the differences between using blender for video editing vs 3D modeling.
This video does 4 things:
1) It shows the user how they can setup blender to be used primarily as a video editor.
2) It introduces the user to "workspaces" through deleting, creating rearranging the tabs.
3) It emphasizes that users should always be aware of Color Management Settings.
4) It sets up Render Defaults that are a good starting point for people that are creating videos for platforms like YouTube.
Video Timeline:
00:16 -- Quick Setup Splash Screen (We will use all the Blender defaults settings)
00:53 -- Templates are preconfigured "editor layouts" and property settings)
01:27 -- For video editing use "View Transform" of "Standard" for better render performance.
02:13 -- Convert "General" Template into a Video Editing Layout (This is a personal preference)
03:00 -- Works Spaces (Tabs across that top that are preconfigured lauyouts)
03:40 -- Delete all Workspaces except for Video editing and Rendering
04:10 -- File Browser setup
05:00 -- Setting up the Properties Settings (Properties Editor type)
05:30 -- Why you shouldn't use "Filmic" View Transform when video editing (Use Standard)
06:25 -- The Preset Icon can be used to auto-fill common Resolution Settings
07:09 -- Start frame and End Frame settings (Frame Range that will Render out)
07:32-- Set Frame Rate (Audio will sync by using the frame rate -- First video import auto sets FPS)
08:00 -- output render folder setting.
08:35 -- Setting up "FFmpeg Video" (All Video Rendering is done using FFmpeg transcoder)
09:00 -- encoding section (Preset Icon -- Select H264 in MP4)
09:36 -- Use High Quality or Perceptually Lossless Output
09:50 -- encoding speed: Slower makes smaller output files but takes slightly longer -- use Good.
10:20 -- Keyframe interval should be 1/2 the video Frame Rate
10:40 -- use max b-frames of 2 (Youtube recommends)
11:00 -- Use AAC audio Codec (192)
11:36 -- setup "Preferences"
12:00 -- I use Resolution Scale of "1.1" and Line Width of "Thick" -- it's easier to grab window edges.
13:39 -- turn off Splash screen
13:50 -- Go to Temporary Windows section, select "Render in" set to "Keep User Interface"
14:39 -- System Tab... Set Sequencer Cache limit to be 80% of your RAM (RAM AMOUNT * 0.8)
17:40 -- Set "Playback" options in the the Sequencer (Av-Sync, Audio Scrubbing, Follow Playhead)
18:18 -- Save Startup file in the File - Defaults menu.