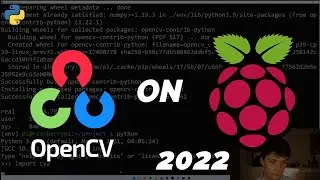
How to Install TensorFlow 2 and OpenCV on a Raspberry Pi
Here's how you can install TensorFlow 2 and OpenCV on your Raspberry Pi all in one video. There are some tricky steps so I try to walk through the whole process slowly and thoroughly. Leave a comment if you have any questions or video requests.
Subscribe for more Raspberry Pi tutorials :) https://www.youtube.com/samwestbytech...
OpenCV tutorials: • OpenCV for Python
I may earn commission if you purchase from the links below:
FREE Amazon Prime: https://amzn.to/3ren80W
FREE Audible Plus: https://amzn.to/3xYzJsR
RASPBERRY PI 4: https://amzn.to/3BC4i9I
RASPBERRY PI PICO START KIT: https://amzn.to/3REvjis
ELECTRONICS COMPONENT STARTER KIT: https://amzn.to/3qB23xg
ASSORTED SENSOR KIT: https://amzn.to/3U7M7zV
USB 1080P WEBCAM: https://amzn.to/3Lq0OL7
INSTRUCTIONS:
0:00 Intro
0:25 Setup your Raspberry Pi.
I recommend using 64-bit Raspberry Pi OS
2:35 Getting started
Access the terminal
cat /etc/os-release
sudo apt update
sudo apt upgrade
3:34 Find your .sh script
python3 -V (take a note of this)
uname -m (take a note of this)
Check if there is a shell file for your Python/Architecture combo here: https://github.com/PINTO0309/Tensorfl...
NOTE: If you have armv7 and Python 3.8 or higher, you will need to either downgrade your Python (which I show) or update to the 64-bit aarch64.
Some example combinations:
If python3 -V = "3.9.*" (* means any number) AND uname -m = "aarch64"
use: https://github.com/PINTO0309/Tensorfl...
If python3 -V = "3.7.*" AND uname -m = "armv7l"
use: https://github.com/PINTO0309/Tensorfl...
If python3 -V = "3.9.*" AND uname -m = "armv7l"
Either install 64-bit Raspberry Pi OS (see beginning of this video)
or
Change Python to 3.7.* (see the next section of this video)
-----------------------------------------------------------------------
5:55 Downgrading Python (OPTIONAL)
(1) Run the easy installer
curl https://pyenv.run | bash
(2) Add pyenv to .bashrc:
Edit the .bashrc with the command
sudo nano ~/.bashrc
(3) Add the following three lines to the botton of the .bashrc file:
export PATH="$HOME/.pyenv/bin:$PATH"
eval "$(pyenv init --path)"
eval "$(pyenv virtualenv-init -)"
(4) Restart the terminal
exec $SHELL
(4) Install system packages
sudo apt-get install --yes libssl-dev zlib1g-dev libbz2-dev libreadline-dev libsqlite3-dev llvm libncurses5-dev libncursesw5-dev xz-utils tk-dev libgdbm-dev lzma lzma-dev tcl-dev libxml2-dev libxmlsec1-dev libffi-dev liblzma-dev wget make openssl
(5) Update pyenv
pyenv update
(6) Install python versions
pyenv install --list
pyenv install ~~Your python version~~
(7) Set python verion
mkdir project
cd project
pyenv local ~~Your python version~~
------------------------------------------------------------------------------
9:30 Install TensorFlow
mkdir project
cd project
python3 -m pip install virtualenv
python3 -m virtualenv env
source env/bin/activate
sudo apt-get install -y libhdf5-dev libc-ares-dev libeigen3-dev gcc gfortran libgfortran5 libatlas3-base libatlas-base-dev libopenblas-dev libopenblas-base libblas-dev liblapack-dev cython3 libatlas-base-dev openmpi-bin libopenmpi-dev python3-dev build-essential cmake pkg-config libjpeg-dev libtiff5-dev libpng-dev libavcodec-dev libavformat-dev libswscale-dev libv4l-dev libxvidcore-dev libx264-dev libfontconfig1-dev libcairo2-dev libgdk-pixbuf2.0-dev libpango1.0-dev libgtk2.0-dev libgtk-3-dev libhdf5-serial-dev libhdf5-103 libqt5gui5 libqt5webkit5 libqt5test5 python3-pyqt5
python3 -m pip install -U wheel mock six
Select the .whl from https://github.com/PINTO0309/Tensorfl...
Select "view raw" then copy the URL
Run:
wget [Raw file URL]
sudo chmod +x [Raw file URL]
./[Tensorflow file]
sudo pip uninstall tensorflow
python3 -m pip uninstall tensorflow
python3 -m pip install tensorflow-[Your version here].whl
exec $SHELL
source env/bin/activate
python
import tensorflow as tf
tf.__version__
quit()
NOTE: If there's an hdf5 warning run this command:
pip uninstall h5py
HDF5_VERSION=[Desired version] pip install --no-binary=h5py h5py==3.1.0
This is from: https://docs.h5py.org/en/stable/build...
--------------------------------------------------------------------------
If you're on a Pi 3 I recommend following this tutorial up to step 17 and then returning to this video: • How to install OpenCV on Raspberry Pi...
python3 -m pip install opencv-python
or
pip install opencv-contrib-python (more libraries and customization)
python3 -m pip install "picamera[array]"
----------------------------------------------------------------------
python
import cv2
import tensorflow as tf
cv2.__version__
tf.__version__
• How to install OpenCV on Raspberry Pi...