Lesson 9 - Model a Sloped Curve 2x1 Part - SolidWorks Tutorial: LEGO Off-Road Buggy
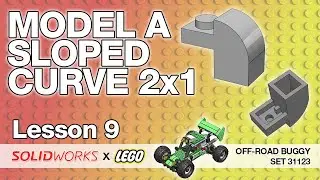
Welcome to Lesson 9 of the SolidWorks x LEGO - Build & Learn series! In this lesson, we tackle the challenge of modeling a sloped curve 2x1 LEGO part with precision and efficiency.
Here’s what you’ll learn:
• Sketching and extruding a complex curved profile.
• Applying a shell feature to create accurate internal geometry.
• Adding fine details, like recessed studs and ribs, for a realistic finish.
• Techniques for aligning and assembling the part into the larger LEGO model.
This lesson is perfect for honing your skills with curved geometry and learning practical SolidWorks tricks. Let’s get started!
Here's the complete playlist ▶ • Build & Learn - Solidworks x Lego - O...
📝 References
🏗️ You can find the Lego set assembly instructions here:
https://www.lego.com/cdn/product-asse...
🖥️ You can find the Lego set with part details on Bricklink here:
https://www.bricklink.com/v2/catalog/...
🔽 FREE DOWNLOAD
Subscribe to our emailing list, and you can download SolidWorks files (2023 version) or 3D STEP files
https://fully-defined.kit.com/aa71b36ce5
📃 Some recommended Videos for SolidWorks Beginners:
Top 10 SolidWorks Design Tutorials ▶ • SolidWorks Tutorials for Designers
Model a Pulley ▶ • SolidWorks Project - Model a Pulley -...
🕰️ Timestamps
0:00 - Introduction
0:30 - Overview of the Sloped Curve 2x1 Part
1:00 - Sketching the Base Profile
2:30 - Extruding with Mid-Plane
4:00 - Adding Dimensions and Tangent Relations
6:00 - Modeling the Recessed Stud
8:00 - Applying the Shell Feature
10:00 - Adding Ribs and Fine Details
12:00 - Finalizing the Part
14:00 - Inserting into the Assembly
16:00 - Adjusting Fit and Tolerances
18:00 - Conclusion


