Tutorial – How to create heightfield landscape in Rhino with heightmap exported from QGIS
This tutorial demonstrates how to use SLU GET (Geodata Extraction Tool) to download heightmaps and orthophotos for educational purposes, how to convert a 32-bit heightmap to a 16-bit one with minimal stepping in QGIS, how to use this for the generation of a heightfield landscape model in Rhino, and how to apply an orthophoto as the colour texture of the landscape model, with the same texture mapping as the heightmap.
As of HT21, QGIS is installed in the following computer labs: ARCPLAN, CADLAB-REMOTELAB, and CHRISTOPHER. Rhino 6 is installed in the following: ARCPLAN, CADLAB-REMOTELAB, XW343-REMOTELAB, and XW41-REMOTELAB. (Check https://www.kth.se/en/student/studier... for current status.)
Expression for use with QGIS' raster calculator tool:
( "InputLayer@1" - X ) / ( Y - X ) * 65535
--------------------------------------------------------------
"InputLayer@1" : the cropped heightmap layer
X = STATISTICS_MINIMUM of the same layer
Y = STATISTICS_MAXIMUM of the same layer
-------------------------------------------------------------
UPDATE 220216:
If the cropped heightmap layer has a negative minimum value, make positively sure to include the minus sign, so that the calculation is correct.
-------------------------------------------------------------
Timestamps:
0:00 Introduction to the Geodata Extraction Tool of SLU
1:58 Importing the heightmap into QGIS
6:15 The importance of 16-bit export of greyscale heightmaps
9:36 Cropping the heightmap
11:34 Remapping the values to the whole 16-bit range
15:02 Convert the file format from 32-bit to unsigned 16-bit
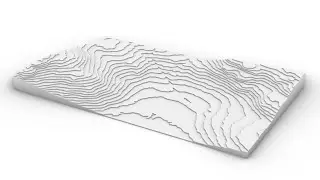
16:56 Using the Heightfield command in Rhino to generate a landscape
21:43 Comparing the result with result of previous tutorial (from height curves) and evaluation of surface model
23:17 Creating a less densely defined heightfield model
24:36 Generating a bounding box to solve texture coordinates remapping
27:12 Final crop of model, solidifying, texture remapping
30:31 Creating a mesh from the brep model
35:30 Exporting a cropped version of an orthohoto in QGIS
38:25 Applying it as colour texture in Rhino
40:00 Comparing the topography of results from this and previous tutorial
42:36 Bonus: use the same texture mapping for identically situated models
Links:
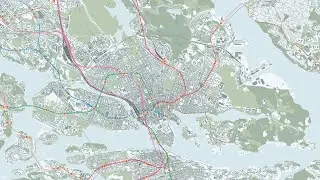
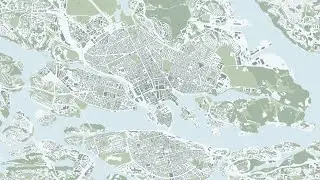
https://zeus.slu.se/get/
This tutorial is part of a series, "General workflow for architecture project":
Part 1: How to create landscape in Rhino with height curves from dpFieldmap
• Tutorial – How to create landscape in...
Part 2: How to create heightfield landscape in Rhino with heightmap exported from QGIS
• Tutorial – How to create heightfield ...
Part 3: How to assign separate material to sides of landscape model in Rhino
• Tutorial – How to assign separate mat...
Disclaimer:
This tutorial aims to increase student awareness of the versatility of the digital tools available for use within the context of the architectural education offered by KTH. As such, it might not be generally applicable, but on the other hand, if even one student is helped by it with fulfilling deliverables requirements, the purpose of this tutorial is satisfactorily achieved. There might be inaccuracies in this tutorial video – if you identify any significant one, please tell us in the comments.


![Tutorial – How to find the best free Digital Elevation Model for use in QGIS as a heightmap [GLO-30]](https://images.videosashka.com/watch/nHV8sW2BUhQ)