Bathroom SINK Leaking Water where Tailpiece & P-Trap Connect (How to Fix Coupling Nut Slow Leak Trap
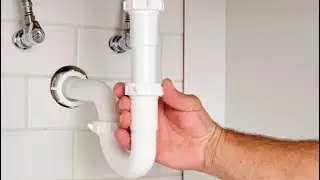
To fix a leak where the bathroom sink tailpiece meets the P trap, follow these steps. Please leave advice and comments in the comment section:1. Turn Off the Water SupplyThis isn’t always necessary for the tailpiece, but it’s a good precaution if you’ll be working around the sink.2. Inspect and Tighten the Slip Joint ConnectionHand Tighten First: Try hand-tightening the slip nut connecting the tailpiece to the P-trap. Many leaks are caused by a loose connection.Use Pliers if Necessary: If it’s still leaking, use a pair of channel-lock pliers to give it a slight turn, but avoid over-tightening, as it could crack the plastic or damage the threads.3. Replace or Reposition the WasherCheck the Washer: Unscrew the slip nut and inspect the washer. If it’s cracked, worn, or missing, it won’t seal properly. Replace it with a new washer designed for the pipe size.Position the Washer Properly: Ensure the beveled side of the washer is facing the tailpiece so it seats snugly inside the fitting.4. Reassemble and Test for LeaksReattach the slip nut and washer, tightening it securely.Run water in the sink and check for leaks. If you still see drips, try slightly tightening the slip nut once more or adjust the alignment between the tailpiece and P-trap.5. Use Plumber’s Tape if NeededAlthough not usually required for slip joint fittings, wrapping a small amount of plumber’s (Teflon) tape around the threads on the tailpiece may help create a better seal if the leak persists.If you’ve tried all the steps and it still leaks, it might indicate a warped or damaged part, in which case replacing the tailpiece or P-trap might be necessary. #sinkrepair #plumbingrepair
Disclaimer: As an Amazon Associate I earn from qualified purchases.
#ad


