17.1 - Blender Video Editing (Rendering H.264 video / Testing bitrate)
Scroll Down for Video "Time Index" (************)
+++++ *Blender 2.79 UPDATE* +++++
Blender 2.79 altered the "Encoding" section.
To change the encoding settings, do the following:
1) Go to the "Output" section and select "FFmpeg video" to reveal all the Video Encoding options.
2) Select Container: "MPEG-4" and Codec: "H.264"
3) Scroll down to the "Audio Codec" section and Select "AAC"
*You can also use "Xvid" by selecting container: "MPEG-4" and Codec: MPEG-4(divx).
Also use "AAC" Audio Codec with this type of video.
If you would like to use "Constant Bitrate" settings instead of the newer "Constant Rate Quality" settings, select "None; use Constant bitrate" from the "Output quality" drop down menu. This will activate the bitrate fields and allow you to designate a video bitrate the same way it has been done in all previous versions of blender.
----------------------------------------------------
Learn to Video Edit with Blender
----------------------------------------------------
My 2.7x Blender Series: https://goo.gl/Wfja4y
My 2.6x Blender Series: https://goo.gl/p8j7D2
----------------------------------------------------
All My Latest Content in 1 place
----------------------------------------------------
http://mikeycal.com/content_channels
-----------------------------------------
Connect and Support Me
----------------------------------------
All Social Media: http://mikeycal.com/contact_me
Paypal Donations: https://goo.gl/822L6f
All Support Options: http://mikeycal.com/support
----------------------
Affiliate Links
----------------------
Sit/Stand Desk, Flexispot products: https://goo.gl/VZ6gGB
$10 coupon code: influenceraff-meyers-10dollar
#############
Video Description
#############
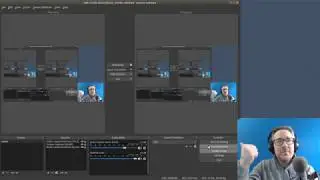
This video is part 1 of a 2 part series on rendering video using blender. In this video, I show you how you can use Blender to render a video to use the popular H.264 video codec. I also show you how you can test your renders to find the best bitrate settings.
(************)
Time Index:
00:00 - Intro to Part 1 - rendering basics intro
00:29 - the Render Tab and the Scene Tab (tabs were editing)
00:50 - Set Display option to "Keep UI"
1:11 - Set the resolution in the Dimensions section.
1:38 - Set Frame range
2:15 - Set Frame rate correctly
2:47 - Set the Output folder
3:15 - Set File Fomat to H.264 (RGB)
3:40 - Verify Encoding settings (AVi, MP4, MKV, MOV) with H.264
4:52 - Setting Bitrate (Higher = quality | Max or 10,000 kb/s)
5:38 - Set a short Frame Range to test the H.264 encode.
6:35 - GOP size (should be set to FPS divided by 2)
7:18 - setting Audio codec (AAC or MP3 | 160 kb/s or higher)
8:13 - Audio Sample Rate (44.1Khz, 48kHz, 96kHz) Scene tab
9:26 - lets do a test render or short frame range
9:53 - evaluate results, lower by 1000kb/s and retest quality
10:32 - Set the frame range for entire video to render the bitrate
Credits:
----------
The video being edited is "Big Buck Bunny"
(c) copyright 2008, Blender Foundation / www.bigbuckbunny.org
It utilizes a Creative Commons 3 license:
http://creativecommons.org/licenses/b...