Tutorial – Authoring a finishing toolpath in Fusion 360 (From 3D model to CNC fabrication, part 8)
This tutorial demonstrates how to author a finishing toolpath in Fusion 360, in the context of aiming to utilize the CNC router in the KTH Architecture school Workshop.
Timestamps:
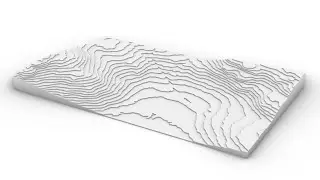
0:00 Evaluating the results of others to determine an endeavourable surface finish
2:02 Choosing a suitable tool for a parallel finishing toolpath
5:23 Estimating reasonable settings for spindle speed, feedrate, and pass depth
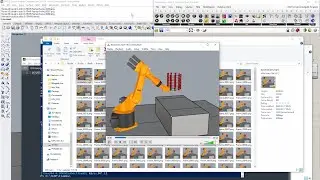
8:25 Adding a 3D Parallel toolpath, and selecting the tool
9:02 Make sure that the tool is assigned a correct tool holder number
9:40 Inputting Spindle speed and Feedrate
10:06 Adding a Machining boundary
11:05 ReSt Machining should have result of previous operation as its outset
11:13 Default Heights values are adequate
11:20 Defining Tolerance
11:32 Pass direction, Stepover, and cutting Both ways
12:21 Multiple depths will be disabled for this particular toolpath, since it is only 1 mm axial stock left from previous operations
12:32 No stock to leave
12:54 Verifying all manipulated values
13:20 Confirm the toolpath settings and let it generate
13:30 Simulating the toolpath and verifying absence of detected collisions
13:59 Showing estimated machining time and actual machining distance
14:11 Playback of the simulation; getting acquainted to the toolpath
16:07 Inputting the Machining time and Machining distance in the KTH_CNC Community Feeds and Speeds document; as well as some helpful notes for your CNC peers
17:43 Exporting the previewed stock as a mesh
18:08 Importing and viewing the previewed stock mesh in Rhino
18:59 Comparison between the different previewed stock meshes
19:16 Saving the document, and outro
Google Drive folder with KTH community resources:
https://drive.google.com/drive/folder...
This tutorial is part of a series, "From 3D model to CNC fabrication":
Playlist link:
• KTH Tutorials – CNC – From 3D model t...
Part 1: The limitations of three-axis CNC milling
• Video
Part 2: Preparing your model in Rhino for CNC milling
• Tutorial – Preparing your model in Rh...
Part 3: Obtaining Educational Access to Fusion 360
• Tutorial – Obtaining Educational Acce...
Part 4: Importing into Fusion 360 and setting up stock
• Tutorial – Importing into Fusion 360 ...
Part 5: Importing a tool library into Fusion 360
• Tutorial – Importing a tool library i...
Part 6: Authoring a clearance toolpath in Fusion 360
• Tutorial – Authoring a clearance tool...
Part 7: Authoring a roughing toolpath in Fusion 360
• Tutorial – Authoring a roughing toolp...
Part 8: Authoring a finishing toolpath in Fusion 360
• Tutorial – Authoring a finishing tool...
Part 9: Post-processing toolpaths in Fusion 360
• Tutorial – Post-processing toolpaths ...
Part 10: Preparing your physical stock for CNC milling
• Tutorial – Preparing your physical st...
Part 11: Initializing the CNC machine and setup tools
• Tutorial – Initializing the CNC machi...
Part 12: Calibrating tools and defining work origin
• Tutorial – Calibrating tools and defi...
Part 13: Executing the toolpaths and cleaning up
• Tutorial – Executing the toolpaths an...
Disclaimer:
This tutorial aims to increase student awareness of the versatility of the digital tools available for use within the context of the architectural education offered by KTH. As such, it might not be generally applicable, but on the other hand, if even one student is helped by it with fulfilling deliverables requirements, the purpose of this tutorial is satisfactorily achieved. There might be inaccuracies in this tutorial video – if you identify any significant one, please tell us in the comments.


![Tutorial – How to find the best free Digital Elevation Model for use in QGIS as a heightmap [GLO-30]](https://images.videosashka.com/watch/nHV8sW2BUhQ)