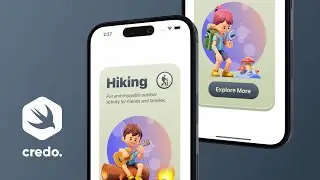
Learn how to develop a professional iPhone app design with SwiftUI 3 [ NEW iOS 15 ]
🟢 LIMITED TIME OFFER - SAVE 37%
Practical iOS and macOS app development tutorials with SwiftUI in 4K
https://credo.academy
Practical iOS and macOS app development tutorials with SwiftUI in 4K
https://credo.academy
The standard user interface library is a great starting point for each iOS project when it comes to app development and design.
However, if we want our application to stand out in the App Store, then we need to learn how to create something new, something unique.
CHAPTERS
00:00 Introduction
00:10 Getting started
00:56 New iOS project
02:34 App icons
03:49 Sound files
05:23 Color sets
08:03 Project structure
09:35 Project settings
10:47 Launch screen
12:46 Problem solving
13:02 Property list
15:52 Basic functionality
17:13 App storage property wrapper
19:15 Onboarding screen
22:15 Home screen
24:05 Final testing
25:17 Wrapping up
You know, my goal with this iOS project is to inspire you on what we can accomplish with SwiftUI.
Therefore, if you want to learn advanced app design, then fire up Xcode and start coding along with me.
All right, let's get started.
First of all, we'll open the resources folder downloaded from this section.
As usual, there are three additional folders and a supplementary workbook file inside it.
You will find the source code of the finished project in the green folder.
This source code can help you when you get stuck and need some quick assistance.
In the pink folder, you will find all the resource materials.
Finally, we are going to save our new project in the blue folder.
Great! Now let's open the workbook document and take a brief look at the learning objectives.
As you can notice, there is a comprehensive list of the topics we will cover in this SwiftUI project.
Are you such excited as I'm?
Cool!
Now let's close this document and open Xcode with the latest version downloaded from the App Store.
New project
Our first step is to create a new Xcode project from the welcome screen.
There is a new pop-up window from which first we need to select the "iOS" menu bar.
After that, we need to choose the App template from the available options.
Finally, click on the Next button to go to the project configuration window.
Now, we need to configure this new iOS project:
For the product name enter. Restart.
For the team option:
If you already have an Apple developer account, logging in here allows you to build your app on a real device.
If you don't have an Apple developer account, you can skip this part and test your app in the iOS Simulator on your Mac.
Organization Identifier:
We usually enter our website address in reverse order.
For example, academy dot credo.
Please make sure that your organization is different so you can compile the provided finished project if it's necessary.
The bundle identifier is automatically combined from the project name and the organization identifier.
Next! The app interface must be SwiftUI.
After that, let's keep Swift as the primary programming language.
Finally, since we will not use Core Data or Unit Testing in this project, therefore please uncheck these options.
After all of the necessary settings, click on the Next button, and now we need to tell Xcode where we want to save our SwiftUI project on the computer.
Please navigate to the Students folder as the destination as I do.
Now, click on the Create button, and Xcode creates all files and folders for this advanced project.
This 4K tutorial is part of the bestseller SwiftUI Masterclass course with more than 13 thousand students at the Credo Academy.
#SwiftUI #CredoAcademy #iOSDevelopment

![[FREE] SLIMESITO x BEEZYB TYPE BEAT 2022 -](https://images.videosashka.com/watch/1EoTITwenvE)








![iOS App Development for Beginners [ NEW 2022 ] SwiftUI Tutorials in 4K High-Quality](https://images.videosashka.com/watch/v5XoD5T3poQ)
![Learn how to develop a professional iPhone app design with SwiftUI 3 [ NEW iOS 15 ]](https://images.videosashka.com/watch/DhWnRNJhm-c)
