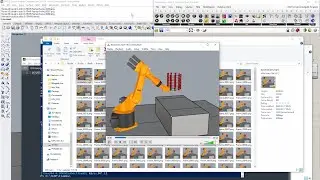
5 minutes on: File management – Merge Individual Video Clips Into One Using FFmpeg [FFmpeg: Part 1]
This is a very brief 5-minute video on the procedure of using FFmpeg in Windows to merge individual video files into one. This lays the foundation of a succeeding tutorial, where the merged video file (or any individual video file) has a proportion of its frames extracted, and these extracted frames converted into a timelapse. But this tutorial shows only the first step, in addition to downloading the program and setting up an easy workflow for using the Command Prompt. For the continuation of the full procedure, please watch part 2 via the following link:
• 5 minutes on: File management – Extra...
Timestamps:
0:05 Introduction to the example scenario and scope of this and succeeding tutorial
0:21 Downloading FFmpeg, and logic of non-installed executable program
1:01 Copying the full object name from Security tab of Properties interface
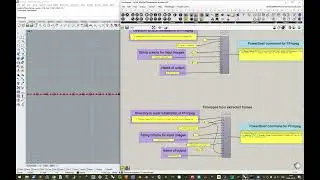
1:35 Referencing all files-to-be-merged in separate text file
2:55 Running the Command Prompt, and changing current directory
4:21 Executing the command to initialize the FFmpeg merge function
5:20 The "speed" metric can give you a hint of expected processing time
N.B.! This video depicts a scenario where five individual video clips are merged, where one is of a different format than the four others – this was erroneous of us to introduce and unpedagogical to demonstrate, since we ultimately did not manage to successfully merge the video of the fifth with the four others (although audio worked fine). No matter if using the "-vcodec copy" argument (which copies the video codec of the source file) or a "-vcodec libx264" one (which reencodes all video clips using the libx264 video codec), the video contents of the fifth file was not included in the merged file (but the audio was however). Thus our recommendation is to only use the demonstrated workflow when the files to be merged are of the same source, when it is most reasonable that all video files are encoded with the same source video codec. (In this example, the four videos were edited directly on iPhone before exported, while the fifth was left unedited and as such exported as-is, which accounts for the discrepancy in file formats and video codecs.)
Links:
https://www.ffmpeg.org/
https://www.gyan.dev/ffmpeg/builds/
Command Prompt commands:
To change drive to the drive of the intended directory (if necessary), input the drive letter and a colon (":"), e.g.:
W:
To change the current directory to the intended directory, input "cd " followed by the directory, e.g.:
cd W:\Kristineberg\FromGamman_OriginalGimbalVideo+TrackedCamera\DJIOsmo
To merge files in the current directory using FFmpeg, input:
[DIRECTORY TO ffmpeg.exe] -safe 0 -f concat -i [NAME OF FILE LIST TEXT FILE IN THE CURRENT DIRECTORY] -vcodec copy -acodec aac -strict -2 -b:a 384k [NAME OF OUTPUT MERGED FILE]
Example of above:
C:\Users\aifoskela\Desktop\ffmpeg-2022-02-10-git-b6bb6b9f22-essentials_build\bin\ffmpeg.exe -safe 0 -f concat -i FileList.txt -vcodec copy -acodec aac -strict -2 -b:a 384k Merged.mp4
Disclaimer:
This tutorial aims to increase student awareness of the versatility of the digital tools available for use within the context of the architectural education offered by KTH. As such, it might not be generally applicable, but on the other hand, if even one student is helped by it with fulfilling deliverables requirements, the purpose of this tutorial is satisfactorily achieved. There might be inaccuracies in this tutorial video – if you identify any significant one, please tell us in the comments.


![Tutorial – How to find the best free Digital Elevation Model for use in QGIS as a heightmap [GLO-30]](https://images.videosashka.com/watch/nHV8sW2BUhQ)