5 minutes on: File management – Extract Frames and Create Timelapse Using FFmpeg [FFmpeg: Part 2]
This is a very brief 5-minute video on the procedure of using FFmpeg in Windows to extract frames from a video file and create a timelapse from the extracted frames. This builds upon the foundation of a preceding tutorial, where multiple video clips were merged into one video file. This tutorial shows only the second part of the full workflow, and it is recommended to have viewed the first part. For the preceding part of the full procedure, please watch part 1 via the following link:
• 5 minutes on: File management – Merge...
Timestamps:
0:05 Extracting individual image frames from video file
2:53 Creating a timelapse from the extracted frames
5:02 Correction of recommended workflow; PNG quality compared to default JPG compression
5:41 Sampled timelapse
Links:
https://www.ffmpeg.org/
https://www.gyan.dev/ffmpeg/builds/
Command Prompt commands:
For all of the below, make absolutely sure that the current directory is correct. If unsure, please watch the previous tutorial (linked above).
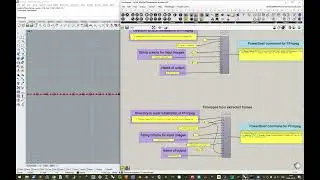
To extract frames from a video file using FFmpeg, input:
[DIRECTORY TO ffmpeg.exe] -i [NAME OF FILE IN CURRENT DIRECTORY TO EXTRACT FROM] -vf fps=[FRAMERATE FOR FRAME EXTRACTION] [OUTPUT PREFIX]%04d.[OUTPUT FILE TYPE]
Example of above:
C:\Users\aifoskela\Desktop\ffmpeg-2022-02-10-git-b6bb6b9f22-essentials_build\bin\ffmpeg.exe -i Merged.mp4 -vf fps=1 frame%04d.png
Examples of fps=X values to define as extraction framerate:
fps=1
// one image every second
fps=12
// 12 images per second
fps=1/60
// one image every minute
fps=5/60
// 5 images every minute
fps=1/600
// one image every ten minutes
To create a timelapse from individually extracted frames using FFmpeg, input:
[DIRECTORY TO ffmpeg.exe] -f image2 -framerate [FRAMERATE FOR INPUT FRAMES] -i [PREFIX TO SEARCH FOR]%04d.[FILETYPE TO SEARCH FOR] -r [OUTPUT FRAMERATE] [FILENAME OF OUTPUT FILE]
Example of above:
C:\Users\aifoskela\Desktop\ffmpeg-2022-02-10-git-b6bb6b9f22-essentials_build\bin\ffmpeg.exe -f image2 -framerate 24 -i frame%04d.png -r 24 Timelapse.mp4
N.B.! If you want JPEG output for the extracted frames, but with higher quality than default, you may add "-qscale:v 2" immediately after the input file, e.g.:
C:\Users\aifoskela\Desktop\ffmpeg-2022-02-10-git-b6bb6b9f22-essentials_build\bin\ffmpeg.exe -i Merged.mp4 -qscale:v 2 -vf fps=1 frame%04d.jpg
The default quality scale range of JPEG output in FFmpeg is from 2 (best quality) to 31 (worst),
Disclaimer:
This tutorial aims to increase student awareness of the versatility of the digital tools available for use within the context of the architectural education offered by KTH. As such, it might not be generally applicable, but on the other hand, if even one student is helped by it with fulfilling deliverables requirements, the purpose of this tutorial is satisfactorily achieved. There might be inaccuracies in this tutorial video – if you identify any significant one, please tell us in the comments.


![Tutorial – How to find the best free Digital Elevation Model for use in QGIS as a heightmap [GLO-30]](https://images.videosashka.com/watch/nHV8sW2BUhQ)