#Photoshop
Hello Friends aaj ke is video me aapko layer mask ke bare me pata lagega jisme layer mask kya hota hai, layer mask ka use kya hai, layer mask ke function kya hai or kaise hum layer mask ko apne editing or project me use kar sakte hai aap is vieo ko pura dekhe or janiye layer mask ke bare me.
Agar yeh video acha lage to plz Like | Share | Comment jarur kare or channel ko subscribe jarur kare !
Subscribe Now : https://goo.gl/H3O3S8
Mere channel ko aap sabhi ka support cahiye jisse main aapke liye aise hi photoshop tutorial ki video banata rahu :)
Agar aapko koi bhi problem aati hai to plz comment me btaye :)
LET'S BE FRIENDS!
FB Page : https://goo.gl/NsjEPe
Instagram : https://goo.gl/Q5tn7n
Official Instagram : https://goo.gl/nUUhEG
Twitter : https://goo.gl/oayGCn
Google + : https://goo.gl/5STvrs
Tumblr : https://goo.gl/OQHVVi
Pinterest : https://goo.gl/AN1rCn
Website : https://goo.gl/ThqjRT
-----------------Others Easy Photoshop Tutorial Videos you Can Also Like---------------------
How to Create Amazing Glitch Effect | CRT Glitch Effect - Photoshop Hindi Tutorial (NKGraphicx): https://goo.gl/HTE2FD
How to Change Keyboard Shortcuts in Photoshop in Hindi (N.K): https://goo.gl/hSfAhW
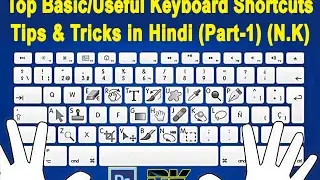
Photoshop -Top Basic/Useful Keyboard Shortcuts/Tips & Tricks in Hindi (Part-1) (N.K): https://goo.gl/PtVSq1
Photoshop -Top Basic/Useful Keyboard Shortcuts/Tips & Tricks in Hindi (Part-2) (N.K): https://goo.gl/7e5Zwo
How to Put images on T-Shirts in Photoshop | Photoshop Tutorial in Hindi (N.K): https://goo.gl/DUpx6Z
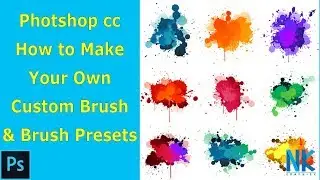
How to Make Your Own Custom Shapes, Brush and Pattern Presets Photoshop Tutorial in Hindi (N.K): https://goo.gl/pfQ1Lu
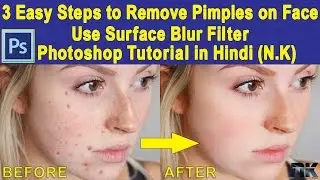
Photoshop Tutorial: 3 Easy Steps to Remove Pimples on Face | Use Surface Blur Filter in Hindi (N.K): https://goo.gl/jCdh3b
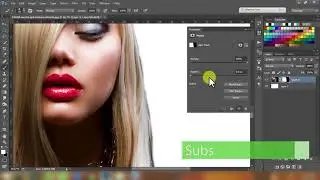
Photoshop cc Hindi Tutorials, Hair Cutout & Remove Background | Wispy Hair Extraction (N.K): https://goo.gl/ED7CSy
How To Make Long Shadow In Photoshop- Any Version | No Script or Plugin | Simple Method | NKGraphicx: https://goo.gl/vzhEqq
How To Install PSD Codec & View A PSD File As A Thumbnail in Explorer on Windows 7/8/10 (NKGraphicx): https://goo.gl/gDSFrf
-----------------------------------------------------------------------------------------------------------------------
Learn how to use masks to hide and reveal portions of layers in Adobe Photoshop. With this valuable compositing technique, you can combine multiple photos into a single image or remove a person or object from a photo
How to Use Layer Masks in Photoshop
Layer Masks are one of the most important tools in Photoshop. In short, they make part of a layer visible and part invisible. The main advantage to using layer masks is they can be changed at any time – they are “non-destructive”, meaning they will never destroy image pixels!
What do Layer Masks Do?
Layer masks control the visibility of a layer, group, or adjustment layer. When a layer mask is completely white, the layer is completely visible. When a layer mask is completely black, the layer is completely invisible.
You can choose to make parts of a layer invisible by painting black in certain areas. You can use most of the tools in the tool panel on a layer mask including the brush tool, clone stamp tool, gradient tool, and selections.
For instance, if you want to cut the subject out of their background, make a selection around the subject and load that selection as a layer mask, the subject will be visible and the background will be invisible.
Destructive vs. Non-Destructive Editing
When it comes to editing images in Photoshop, the ultimate goal is to do everything in a ‘non-destructive’ manner – meaning any change can be undone at any point in time.
For example, if you want part of a layer to disappear, using the eraser tool is destructive because it destroys the image, rather than just hiding it. If you use the eraser tool, then save and close an image, you won’t be able to undo those changes the next time you open the image in Photoshop.
In contrast, layer masks allow you to make changes at any time – even years from now. Rather than destroying image pixels, they simply hide them.
How to Create and Use Layer Masks
To add a layer mask to a layer, click on the layer mask icon at the bottom of the layers panel (it looks like a square with a circle inside).
You can also use the menu, go to ‘Layer – Layer Mask – Reveal All’ to make a white layer mask.
Adjustment layers come pre-loaded with layer masks, simply paint white or black on them to determine the visibility of the layer.
Helpful Keyboard Shortcuts
When working with Layer masks, a few keyboard shortcuts can go a long way.
SHIFT+CLICK on Layer Mask – Disable Layer Mask Temporarily
ALT/OPTN+CLICK on Layer Mask – Show Contents of Layer Mask
CTRL/CMD+CLICK on Layer Mask – Turn Layer Mask into Selection
CTRL/CMD+I – Invert Layer Mask
/ – View Layer Mask in Quick Mask Mode