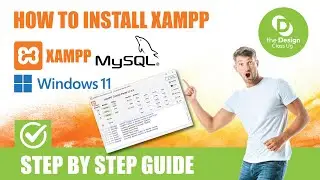
How to Install Xampp on Windows 11 | Must Know !!
@thedesignclassug
--------------------------------------------------
#xamp #xampserver #installxamp #windows11
How to Install Xampp on Windows 11
Installing XAMPP on Windows 11 is a straightforward process. Here’s a step-by-step guide to help you get started:
Step 1: Download XAMPP
1. Visit the XAMPP website: Go to the [official XAMPP website(https://www.apachefriends.org/index.h....
2. Choose your version: Click on the download link for the Windows version. You’ll see options for different versions of PHP; choose the one that suits your needs.
Step 2: Install XAMPP
1. Run the installer: Once the download is complete, locate the downloaded `.exe` file (usually in your Downloads folder) and double-click it to run.
2. User Account Control: If prompted by User Account Control, click "Yes" to allow the installer to run.
3. Installation wizard: Follow the prompts in the installation wizard:
Select components: You can choose which components to install. By default, Apache, MySQL, PHP, and Perl are selected. You can leave these as is or adjust according to your needs.
Installation folder: Choose the installation directory (the default is usually fine, e.g., `C:\xampp`).
4. Bitnami for XAMPP: You may be prompted to install Bitnami for XAMPP. You can choose to include it or skip this step.
5. Start installation: Click "Next" to start the installation process. It may take a few minutes.
Step 3: Launch XAMPP
1. Finish installation: Once the installation is complete, make sure the "Start the Control Panel" checkbox is checked and click "Finish."
2. Control Panel: The XAMPP Control Panel will open. Here you can start or stop the Apache and MySQL servers.
Step 4: Test the Installation
1. Open your web browser: Type `http://localhost` in the address bar and press Enter.
2. Check the dashboard: If XAMPP is installed correctly, you should see the XAMPP dashboard.
Step 5: Configure (Optional)
You can configure your server settings by editing the `httpd.conf` file for Apache and the `my.cnf` file for MySQL, both accessible via the XAMPP Control Panel.
Troubleshooting
Firewall: If you encounter issues, check your firewall settings to ensure Apache and MySQL are allowed through.
Port Conflicts: If Apache doesn’t start, it may be due to port conflicts (e.g., with Skype). You can change the default ports in the XAMPP configuration files.
Now you’re all set to start developing with XAMPP on Windows 11! If you have any specific questions or run into issues, feel free to ask in the comment section.
-----------------------------------------------
Must Watch for you:
How to download a Premium Vector from Freepik for free
→ • How to download a Premium Vector from...


