How to install a fresh macOS on VMWare Workstation in Windows OS - From A to Z
00:00 #Part_One: Download and Install Python on Windows OS
00:02 Go to website: https://www.python.org/downloads/
00:33 Restart the machine
00:40 #Part_Two: Download macOS Recovery Base system Image BaseSystem.dmg
00:42 Go to https://github.com/acidanthera/OpenCo...
00:53 Download the latest released version of the OpenCore Zip file.
01:06 Extract OpenCore zip file
01: 11 Navigate to folder Utilities/macrecovery
01:23 Open CMD (Command Prompt) from the current directory
01:35 Type "dir" command to check the list of files and folders
01:38 Type command " type " then the file name " recovery_urls.txt
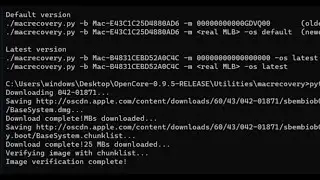
01:43 Copy the command for the latest version " macrecovery.py -b Mac-B4831CEBD52A0C4C -m 00000000000000000 "
01:45 Type command " python macrecovery.py -b Mac-B4831CEBD52A0C4C -m 00000000000000000 download "
02:25 Navigate to the folder " com.apple.recovery.boot "
02:29 Copy/paste or Move file " BaseSystem.dmg " to Desktop
02:37 Delete OpenCore and Python Installer files/folders
02:42 #Part_Three: Convert the .dmg file to a .vmdk file
02:43 #Part_Three_A: Download dmg2img software and convert the .dmg file to an image file .iso
02:44 Download dmg2img win32 binary from this link: https://vu1tur.eu.org/tools/dmg2img-1...
03:13 Extract the dmg2img-1.6.7-win32.zip file
03:22 Copy "BaseSystem.dmg" file into dmg2img folder
03:30 Open CMD (Command Prompt) from the current directory
03:37 Type the "dir" Command to view the list of files and folders
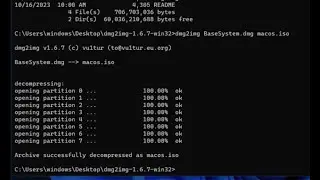
03:41 Type command " dmg2img BaseSystem.dmg macos.iso "
04:01 Copy/paste or move the macos.iso file to the Desktop
04:10 Delete the dmg2img folders
04:16 #Part_Three_B: Download qemu-img software and convert the .iso file to a .vmdk file
04:17 Download the latest qemu-img from this link: https://qemu.weilnetz.de/w64/
04:41 Install Qemu on Desktop
05:11 Copy macos.iso file into Qemu folder
05:17 Open CMD (Command Prompt) from the current directory
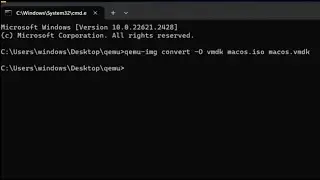
05:25 Type command " qemu-img convert -O vmdk macos.iso macos.vmdk
05:46 Copy/paste or move " macos.vmdk " file to the Desktop
06:02 #Part_Four: Download and Install VMWare Workstation Pro on Windows OS and patch Unlocker
06:04 Download VMWare Workstation Pro from this link: https://www.vmware.com/products/works...
06:42 Install VMWare Workstation Pro on Windows OS
07:23 Restart the Windows machine
07:33 Download Dr. Unlocker from this link: Unlocker https://github.com/DrDonk/unlocker/re...
08:05 Extract the unlocker zip file
08:16 Navigate into the "windows" folder and run the "unlocker " file as Administrator
08:36 #Part_Five: Create a new Virtual Machine for macOS
08:50 Create the Virtual Machine for macOS with RAM of more than 4 GB, and CPU of more than 4 numbnbers of Cores, Enable the feature " Virtualization intel VT-x/EPT or AMD-x/RVI " and enable the feature " Accelerate 3D graphics " then click Finished.
09:49 Add and attach the " macos.vmdk " file as the existing virtual disk
10:24 Open and Edit the " macOS.vmx " file with Notepad and add these values:
smc.version = "0"
board-id = "Mac-551B86E5744E2388"
hw.model.reflectHost = "FALSE"
hw.model = "MacBookPro18,3"
serialNumber.reflectHost = "FALSE"
serialNumber = "C02574632153"
smbios.reflectHost = "FALSE"
efi.nvram.var.ROM.reflectHost = "FALSE"
efi.nvram.var.MLB.reflectHost = "FALSE"
efi.nvram.var.ROM = "3c0754a2f9be"
11:20 And fine and change the value of " board-id.reflectHost " in the file to "FALSE" and save it
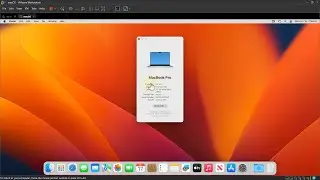
11:49 #Part_Six: Install macOS in Virtual Machine.
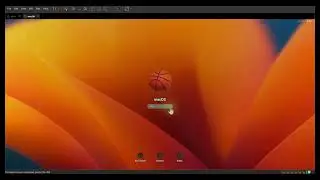
11:50 Power on the Virtual Machine
12:02 Initialize a Hard Drive Media
12:27 Install macOS
13:52 #Part_Seven: Install VMWare Tools


