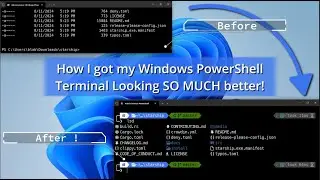
3 Pane iTerm2 with Custom Banner
Learn how to create a 3-Pane iTerm2 layout that displays a custom banner in the bottom right pane and show the kubectl and Powershell versions in the bottom left pane, all under MacOS Monterey.
Also covered:
how to install homebrew on MacOS
how to install iterm2 using brew
how to install jq using brew
how to install meslo nerd fonts using brew
how to install kubectl using brew
how to install powershell using brew
Chapters:
00:00 - Intro
00:25 - Background
01:42 - Begin Instructions
01:52 - Get Custom Banner
04:10 - Install homebrew
06:05 - Install iTerm2 using brew
09:02 - Install jq using brew
09:23 - Install Meslo Nerd fonts using brew
11:10 - Install kubectl using brew
14:33 - Install powershell using brew
15:50 - Split iTerm into 3 Panes
16:29 - Create iTerm Profiles for each pane
Reference:
My GitHub repo: https://github.com/burkeazbill/termin...
My custom banner: curl https://raw.githubusercontent.com/bur... -o ~/.banner.rc
homebrew: https://brew.sh /bin/bash -c "$(curl -fsSL https://raw.githubusercontent.com/Hom...)"
iterm2: https://iterm2.com/downloads.html brew install --cask iterm2
git:brew install git
jqbrew install jq
Meslo fonts: brew install homebrew/cask-fonts/font-meslo-lg-nerd-font
Use: MeslogLGM Nerd Font Mono for terminals
Kubectl: brew install kubernetes-cli
PowerShell: brew install --cask powershell
Bottom-Left Pane send text:
clear && echo kubectl $(kubectl version --client=true -o json | jq .clientVersion.gitVersion | cut -d '"' -f2) && pwsh --version
=======================================
Blog: https://dimensionquest.net
If you wish to support this channel:
Feel free to tip me here https://ko-fi.com/DimensionQuest
Disclaimers:
===========
Please note all non-English Subtitles are auto-translated.
This video was NOT sponsored by any vendor. Any paid products/services shown were paid for out of my own pocket.
The following are PAID affiliate links. Any revenue generated via the links below will help pay for systems and services used in the hosting and production of my content:
===========
RackNerd VPS: https://bit.ly/dqRackNerd
Domain Registration, CPanel Shared Hosting, VPS, SSL via NameCheap: https://bit.ly/dqNameCheap
== My Gear - #AD Amazon Links:
As an Amazon Associate, I earn from qualifying purchases.
USB Capture Device: https://amzn.to/3NFvdpR
Standing Desk: https://amzn.to/3hBXFJG
34in Monitor: https://amzn.to/3HBCwKj
Thunderbolt 3 Dock: https://amzn.to/36W7YXb
== Workstation Build:
Full Tower Case: https://amzn.to/3vqJtKM
MB: https://amzn.to/3WSpNuY
CPU: https://amzn.to/3jCvij4
Cooler: https://amzn.to/3i1gyJW
Memory: https://amzn.to/3WQtBg5 (X2 for 128GB)
GPU: https://amzn.to/3G2f5v8
PSU: https://amzn.to/3PY54nf
Cache (nvme): https://amzn.to/3vn1qd2
OS (nvme): https://amzn.to/3vnDUwr
Data (SSD): https://amzn.to/3C9Ae5e (X2)
Keyboard: https://amzn.to/347VfPA
Mouse: https://amzn.to/3C8KzgH
Microphone: https://amzn.to/3JD4Myv