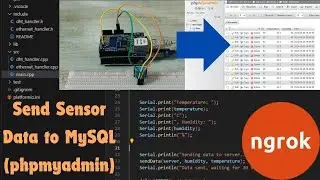
Send Temperature & Humidity Data from Arduino(Ethernet Shield) to Public MySQL by ngrok & PlatformIO
Welcome to our tutorial on sending temperature and humidity data from an Arduino with an Ethernet shield to a MySQL server(phpmyadmin) using PlatformIO and ngrok! In this video, we'll guide you step-by-step through the process of setting up your Arduino, configuring the necessary software, and making your local server accessible from anywhere using ngrok.
What You'll Learn:
Setting Up the Arduino with Ethernet Shield:
Install the DHT sensor library.
Connect the DHT sensor and Ethernet shield to the Arduino.
Write and upload the code to read temperature and humidity data and send it over Ethernet.
Using PlatformIO in VS Code:
Install and configure PlatformIO IDE in Visual Studio Code.
Manage libraries and dependencies with PlatformIO.
Configuring MySQL and PHP:
Set up a MySQL database and create a table for storing sensor data.
Write a PHP script to insert data into the MySQL database(phpmyadmin).
Host your PHP script on a local server using XAMPP.
Making Your Localhost Public with ngrok:
Install and configure ngrok.
Securely expose your local server to the internet.
Update your Arduino code to send data to the public URL provided by ngrok.
Requirements:
Arduino board (e.g., Uno, Nano) with Ethernet shield
DHT11 or DHT22 sensor
Ethernet cable
Computer with Visual Studio Code installed
PlatformIO IDE extension
XAMPP local server environment
ngrok account (free tier available)
Code and Resources:
GitHub Repository: https://github.com/Embedotronics/Ardu...
ngrok Download: https://ngrok.com/download
Additional Resources:
How to program Arduino in VS Code using PlatformIO IDE: • How to program Arduino in VS Code usi...
Arduino interfacing with DHT11 with PlatformIO using VS Code: • Arduino interfacing with DHT11 with P...
Installing XAMPP, Creating & Running Your First PHP Program in Browser: • Installing XAMPP, Creating & Running ...
How to Install Ngrok on Windows 11/10 and Make Your Localhost Publicly Accessible: • How to Install Ngrok on Windows 11/10...
Timestamps:
0:00 - Introduction
1:20 - Setting Up XAMPP
3:00 - Hardware Setup
6:50 - Understanding the XAMPP Control Panel
10:00 - Creating a Database in phpMyAdmin
13:55 - PHP Script Explanation
18:05 - Manually Inserting Sensor Data
19:30 - Writing Code in PlatformIO (VS Code Editor)
24:00 - Compilation
25:26 - Code Explanation
31:10 - Uploading the Code
33:25 - Using ngrok to Make Local IP Publicly Accessible
If you find this video helpful, please give it a thumbs up, subscribe to our channel, and hit the bell icon to get notified about our latest tutorials. Feel free to leave any questions or feedback in the comments below.
Follow Us:
LinkedIn: linkedin.com/in/pawan-joshi-7a196334
Facebook: facebook.com/Embedotronics
Instagram: instagram.com/embedotronics
GitHub: github.com/Embedotronics
Hackster: hackster.io/embedotronics-technologies
Instructables: instructables.com/member/embedotronics
Thank you for watching!
Tags
Arduino
MySQL
PlatformIO
VS Code
VS Code Editor
ngrok
DHT sensor
Temperature and humidity sensor
Arduino tutorial
IoT
Internet of Things
Data logging
PHP MySQL
Localhost server
XAMPP
Remote server access
Arduino project
Coding tutorial
DIY electronics
Sensor data
Arduino IDE
PlatformIO tutorial
Web development
Database
Public server access
Arduino data logger
Arduino and MySQL
Arduino sensors
Real-time data logging
Arduino coding
Arduino with PHP
Arduino with ngrok
Arduino beginner project
Environmental monitoring
Arduino data transmission
Ethernet shield
Arduino Ethernet shield
Networking with Arduino
Hashtags
#ArduinoMySQL
#ArduinoEthernetShield
#PlatformIOIDE
#VSCodeEditor
#ngrokIntegration
#TempHumiditySensor
#IoTProject
#DIYIoT
#SensorDataLogging
#MySQLDatabase
#ArduinoTutorial
#EthernetConnectivity
#RemoteServerAccess
#ArduinoDataTransmission
#PlatformIOTutorial
#ArduinoDHTSensor