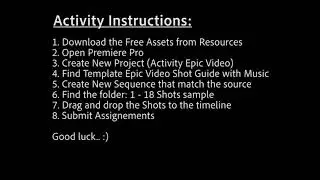
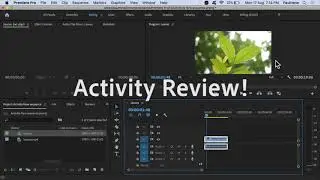
How to do 4 Point Editing in Premiere Pro CC 2020
To perform 4-point editing in Premiere Pro CC, follow these steps:
1. Import your footage and create a new sequence in Premiere Pro.
2. In the Project panel, locate the clips you want to use for editing.
3. Set In and Out points for the clips by either using the source monitor or directly on the timeline.
4. Place the playhead at the desired location in the timeline where you want to insert the clips.
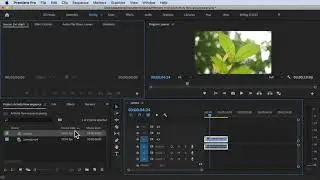
5. In the Project panel, select the first clip you want to insert and drag it to the Source monitor.
6. Set the In and Out points for the clip in the Source monitor to define the portion you want to insert.
7. In the Source monitor, right-click and select "Mark In" and "Mark Out" to set the desired range.
8. With the playhead still at the desired location in the timeline, click and drag the clip from the Source monitor to the timeline.
9. The clip will be inserted at the playhead position, and the existing clips will be shifted accordingly.
10. Repeat the process for other clips you want to insert using 4-point editing.
By using 4-point editing, you have precise control over the placement and duration of your clips in the timeline, allowing you to create seamless and polished edits in your Premiere Pro projects.
For a more in-depth understanding of Premiere Pro CC and to explore advanced techniques, enroll in our comprehensive Udemy online course: https://bit.ly/3JfZlqu
Take your editing skills to the next level and become a Premiere Pro expert today!
Remember to like this video, subscribe to our channel for more tutorials, and hit the notification bell to stay updated with our latest video releases. Happy editing!


![[FREE 10-hour Full Course] ChatGPT Prompts Mastery: 50,000+ Prompts | 20-in-1 Online Course](https://images.videosashka.com/watch/Z31NfTpzDV4)