How to Add Basic 3D Effect in Premiere Pro CC 2020 Video
How to Add Basic 3D Effect in Premiere Pro CC 2020 Video
Description:
In this tutorial, we will guide you through the step-by-step process of adding a basic 3D effect to your videos using Adobe Premiere Pro CC. Discover how to transform your flat footage into visually engaging content with depth and dimension. Whether you want to add a subtle parallax effect or create dynamic text animations, this tutorial will teach you the fundamentals of creating a 3D look in Premiere Pro CC.
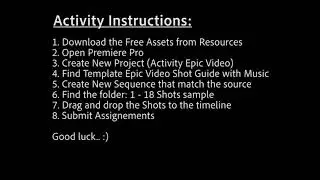
Step-by-Step Guide:
Step 1: Import Footage
- Launch Adobe Premiere Pro CC and create a new project.
- Import your desired footage by clicking on the "File" menu and selecting "Import" or by using the shortcut Ctrl+I (Cmd+I on Mac). Choose the footage you want to apply the 3D effect to and click "Import."
Step 2: Create a New Sequence
- Right-click in the Project panel and select "New Sequence" from the context menu.
- Choose a preset that matches the settings of your footage or customize the sequence settings according to your preferences. Click "OK" to create the new sequence.
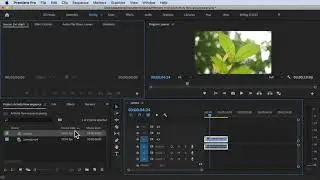
Step 3: Apply Basic 3D Effect
- Locate the footage in the Project panel and drag it onto the timeline.
- Select the footage on the timeline and navigate to the "Effects" panel.
- Expand the "Video Effects" folder, then expand the "Perspective" folder.
- Drag and drop the "Basic 3D" effect onto the footage on the timeline.
Step 4: Adjust 3D Settings
- With the footage still selected, go to the "Effect Controls" panel.
- Locate the "Basic 3D" effect and adjust the parameters to achieve the desired 3D effect.
- Modify settings such as "Rotation," "Position," "Scale," and "Opacity" to create depth and perspective in your footage.
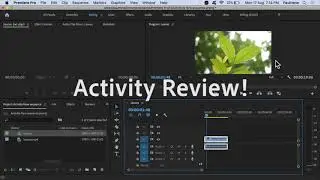
Step 5: Preview and Fine-Tune
- Play back your video in the Program Monitor to preview the 3D effect.
- Make further adjustments as needed to refine the effect. Experiment with different settings to achieve your desired look.
Step 6: Export Your Video
- Once you are satisfied with the 3D effect, go to the "File" menu and select "Export" to render and save your video.
By following these step-by-step instructions, you can easily add a basic 3D effect to your videos using Adobe Premiere Pro CC. Unlock your creativity and bring your footage to life with engaging and dynamic visuals.
For a more in-depth understanding of Premiere Pro CC and to explore advanced techniques, enroll in our comprehensive Udemy online course: https://bit.ly/3JfZlqu
Take your editing skills to the next level and become a Premiere Pro expert today!
Remember to like this video, subscribe to our channel for more tutorials, and hit the notification bell to stay updated with our latest video releases. Happy editing!


![[FREE 10-hour Full Course] ChatGPT Prompts Mastery: 50,000+ Prompts | 20-in-1 Online Course](https://images.videosashka.com/watch/Z31NfTpzDV4)