Premiere Pro 2020 - How to Keep or Change Existing Sequence Settings
To keep or change existing sequence settings in Adobe Premiere Pro, follow these steps:
1. Open your project in Adobe Premiere Pro.
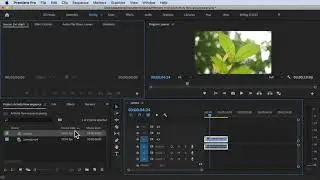
2. Locate the sequence you want to modify in the Project panel.
3. Right-click on the sequence and select "Sequence Settings" from the context menu.
4. The Sequence Settings dialog box will appear, displaying the current settings of the sequence.
5. If you want to keep the existing settings, simply review them and click "OK" to close the dialog box.
6. If you want to make changes to the sequence settings, adjust the desired parameters such as frame rate, resolution, or aspect ratio.
7. As you make changes, the estimated file size and duration will update accordingly.
8. Once you've made the necessary changes, click "OK" to close the dialog box and apply the new settings to the sequence.
9. If prompted to change the sequence settings, choose whether to keep or change the sequence based on the new settings.
10. Your sequence will now reflect the updated settings, allowing you to work with the desired parameters.
Remember, it's important to carefully consider the impact of changing sequence settings, as it may affect how your footage is interpreted and displayed. Always make a backup or duplicate of your sequence before making any significant changes to avoid potential loss of work.
For a more in-depth understanding of Premiere Pro CC and to explore advanced techniques, enroll in our comprehensive Udemy online course: https://bit.ly/3JfZlqu
Take your editing skills to the next level and become a Premiere Pro expert today!
Remember to like this video, subscribe to our channel for more tutorials, and hit the notification bell to stay updated with our latest video releases. Happy editing!


![[FREE 10-hour Full Course] ChatGPT Prompts Mastery: 50,000+ Prompts | 20-in-1 Online Course](https://images.videosashka.com/watch/Z31NfTpzDV4)