How to Create Meta Developer Account
Need help setting up a Meta developer account? Before placing your Meta Quest in developer mode, you need a developer account. This video will show you how to get a Meta Developer account set up, which, among other things, will help you enroll it in an XR mobile device management system.
Now that you've created a Developer Account, learn how to place your Quest headset in Developer mode here: https://help.arborxr.com/en/articles/...
Transcript below:
To get started, first you’ll need a:
Unique email address you’ve created for the device
And a nearby cellular phone for 2 factor authentication
Make sure you note this email address and password down along with future details from this process - and if you need help, we’ve got a template you can use for logging this data to make your life easier in the future.
We’ll start by heading to developer.oculus.com/sign-up. After reading it over, we’ll click sign-up.
A developer account is necessary for enabling Debug mode on your device.
We’ll click continue with email, enter the unique device email address, then move on to creating a new account.
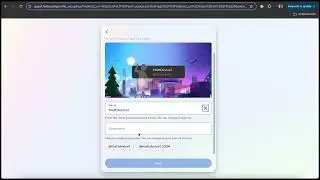
Enter a first and last name, as well as a past birth date, then create a password.
Make sure to keep track of the password for this Meta developer account as well.
Once the account is created, check the email inbox for the 6-digit confirmation code and copy paste it.
Once confirmed, we’ll move through Meta Horizon Profile creation. First hit next, enter a name, and then a username. We recommend inputting a unique username that fits the use case for the device, then recording it into the same excel sheet.
Hit next, and select Solo, before clicking Review and Accepting and continuing.
Now you’re finished and we can move on to 2 factor authentication. For your developer account to function properly, 2fa is needed - and you can set this up easily via text message.
Click Two-factor authentication again, select your account, and click Text Message. Once you enter your phone number, you’ll receive another 6-digit code that you can copy in from your phone.
Now that you’re setup, navigate back to the developer portal and click Back to Home to set up your organization name. This is a unique name, we recommend using one that fits your devices name. Then read and accept the terms, before clicking Submit.
You’re officially ready to move on to pairing your Quest device.