Netgear Ac750 Setup With WPS | Netgear Extender Setup
Netgear AC750 Setup using WPS in just 2 minute by netgear Support.
There are different ways to setup your NETGEAR wireless range extender. This article provides information on how to configure the NETGEAR range extender EX7300 using the WPS push button.
The easiest way to connect the extender to a WiFi network is by using WiFi Protected Setup (WPS). For this method to be successful, your WiFi router must support WPS.
To connect your range extender to a Wi-Fi router using WPS:
Step 1:- Set the Access Point/Extender switch to the Extender position.
Step 2:- Place your extender in the same room as your WiFi router.
Proximity to the WiFi router is required only during the initial setup process.
Step 3:- Plug the extender into an electrical outlet.
Step 4:- Wait for the Power LED to light green.
If the Power LED does not light, press the Power On/Off button on the extender.
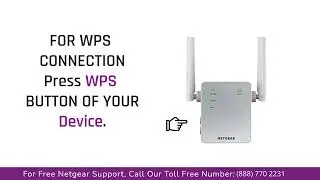
Step 5:- Press the WPS button on the side panel of the extender.
The WPS LED blinks.
Step 6:- Within two minutes, press the WPS button on your router or access point.
When the extender connects to your existing WiFi network, the WPS LED on the extender lights solid green and the Router Link LED lights. If the Router Link LED does not light, try again.
Step 7:- If your WiFi router supports the 5 GHz band, repeat Steps 5 and 6 to connect the extender to the 5 GHz band.
Step 8:- Unplug the extender and move it to a new location that is about halfway between your router and the area with a poor router WiFi signal.
The location that you choose must be within the range of your existing WiFi router network.
Step 9:- Plug the extender into an electrical out and wait for the Power LED to light green.
Step 10:- Use the Router Link LED to help you choose a spot where the extender-to-router connection is optimal.
Step 11:- If the Router Link LED does not light amber or green, plug the extender into an outlet closer to the router and try again.
Keep moving the extender to outlets closer to the router until the Router Link LED lights amber or green.
Step 12:- On your WiFi-enabled device, open the WiFi connection manager and locate and connect to the new extender WiFi network. If you enabled single SSID, the network name will be the as your existing WiFi network name.
If not, the extender creates two new extended WiFi networks. The extender’s new WiFi network names are based on your existing WiFi network name, with _EXT at the end of the name. For example:
Existing WiFi network name. MyNetworkName
New extended network names. MyNetworkName_2GEXT and MyNetworkName_5GEXT
Use the same WiFi password that you use for your WiFi router.
Step 13:- Test the extended WiFi range by moving your computer or WiFi device to the area with a poor router WiFi signal:
Leave your computer or WiFi device in the area with a poor router WiFi signal and return to the extender.
Check the Client Link LED on the extender:
If the Client Link LED is solid green or amber, your extended WiFi network reaches the area with a poor router WiFi signal and your network setup is complete.
If the Client Link LED is red, your extended WiFi network does not reach the area with a poor router WiFi signal.
You must move the computer or WiFi device closer to the extender until the Client Link LED turns solid green or amber.
Related Searches
netgear - ac750 wi-fi range extender wall plug
netgear ac750 wifi extender setup
netgear wifi extender ac750 setup
netgear ac750 extender setup
netgear ac750 ex3700 setup
ac750 wifi range extender setup
netgear ac750 setup
Get Instant Solution to all Problems ⌛
► Call Netgear Support:- (880) 770 2231 (Toll-Free Number)
This Video is the work of the Netgear support team
DISCLAIMER: Please don't go out of your way to or hate on anyone I talk about in my videos, this channel is to educate people and I usually focus on education users through technology.
#Netgear #Extendersuppport #NEtgear_extender #Setup #Guide #techsupport #repeater #AC750 #EX3700
Copyright Disclaimer Under Section 107 of the Copyright Act 1976, allowance is made for, fair use, for purposes such as criticism, comment, news reporting, teaching, scholarship, and research. Fair use is a use permitted by copyright statute that might otherwise be infringing. Non-profit, educational, or personal use tips the balance in favor of fair use.