How to Use Program Monitor in Premiere Pro CC 2020
How to Use Program Monitor in Premiere Pro CC 2020
How to Use Program Monitor in Premiere Pro CC - Step-by-Step Tutorial
Description:
Welcome to our step-by-step tutorial on how to use the Program Monitor in Premiere Pro CC. In this comprehensive guide, we will walk you through the essential steps to effectively utilize the Program Monitor for seamless video editing.
Step 1: Launch Premiere Pro CC
Begin by launching Adobe Premiere Pro CC on your computer. Ensure that you have the latest version installed for optimal performance.
Step 2: Import your media files
Import the media files you want to work with into your Premiere Pro project. Click on "File" and select "Import" to browse and select your desired files from your computer.
Step 3: Create a new sequence
To start editing, create a new sequence by clicking on "File" and selecting "New" followed by "Sequence." Choose the appropriate settings for your project, such as resolution and frame rate.
Step 4: Open the Program Monitor
Locate the Program Monitor panel in the workspace. If it's not visible, go to the "Window" menu and select "Program Monitor" to open it. The Program Monitor allows you to preview and make adjustments to your video.
Step 5: Playback controls
Familiarize yourself with the playback controls in the Program Monitor. Use the play button to start and stop playback, and the scrubber bar to navigate through your video footage.
Step 6: Markers and comments
Utilize markers and comments to annotate and mark specific points in your video. Click on the marker button or use the keyboard shortcut to add markers, and right-click on the marker to add comments or notes.
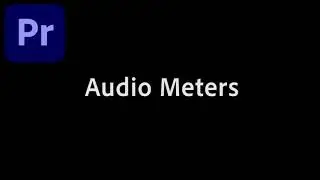
Step 7: Audio adjustments
Make audio adjustments directly in the Program Monitor. Control audio levels, add keyframes, and apply audio effects to ensure high-quality sound in your video.
Step 8: Video effects and color correction
Explore the video effects and color correction options in the Program Monitor. Experiment with different effects, adjust brightness, contrast, and color levels, and enhance the visual appeal of your footage.
Step 9: Multi-camera editing
If you're working with multi-camera footage, use the Program Monitor to switch between different camera angles and create dynamic edits. Select the desired camera angle from the multi-camera view options.
Step 10: Export and save your project
Once you're satisfied with your edits, it's time to export your project. Click on "File" and select "Export" to choose your desired export settings and save your video in the preferred format.
Congratulations! You have now learned the essential steps to effectively use the Program Monitor in Premiere Pro CC. Put your newfound knowledge into practice and unleash your creativity in video editing!
For a more in-depth understanding of Premiere Pro CC and to explore advanced techniques, enroll in our comprehensive Udemy online course: https://bit.ly/3JfZlqu
Take your editing skills to the next level and become a Premiere Pro expert today!
Remember to like this video, subscribe to our channel for more tutorials, and hit the notification bell to stay updated with our latest video releases. Happy editing!
-----------------------------------------------------------------
🎉 Unlock Your Creativity! 🎉
Get 1 month of Skillshare Premium for FREE—that’s unlimited access to 40,000+ hands-on classes taught by creative experts worldwide! Transform your skills and elevate your projects at absolutely no cost!
Claim your free month now! But hurry, this offer won’t last long!
👉 https://www.skillshare.com/en/r/profi...


![[FREE 10-hour Full Course] ChatGPT Prompts Mastery: 50,000+ Prompts | 20-in-1 Online Course](https://images.videosashka.com/watch/Z31NfTpzDV4)