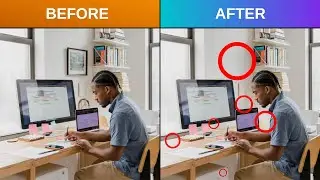
Double Exposure In Photoshop CC 2019 (Joyner Lucas ADHD Album Art)
Double Exposure In Photoshop CC 2019 (Joyner Lucas ADHD Album Art)
How to create the Joyner Lucas ADHD double exposure photo effect using Photoshop CC 2019.
PRE-PRODUCTION
All you need is a camera, some lighting, and a flat backdrop. Some way to stabilize the camera is preferred too, but propping it up against something works too.
If you don't have lights, use as much natural light as possible, but don't over-expose your subject. The sun is a great alternative to studio lighting. Clouds will help diffuse harshness.
PRODUCTION
We'll take two photos - one with just a face, and one with hands cupping the face.
The key is to stay as still as possible while moving your hands up to your face. If impossible, don't worry - you can clean that up in post.
You also want to take advantage of your camera's continuous shooting feature as well as the timer so you can stay still while the camera works its magic. Again, not impossible to complete this effect without it - but it'll help.
Make sure the backdrop is lit evenly to make removing it in post a breeze.
POST-PRODUCTION
Creating the double exposure effect in Photoshop is easy.
Before you start creating double exposure, you'll want to line up your photos as much as possible. This is where the tripod and good lighting will work to your advantage.
If your first set of photos didn't work, simply try again. It'll be worth it.
1. With the Face layer selected, change the blending mode to Darker Color.
2. Erase parts of the Hands layer that you don't want visible in the final photo (extra shoulders, ears, hairline, hat, etc.).
3. Create an Exposure adjustment layer with the following parameters:
Exposure: 58
Offset: Leave at 0
Gamma: 1.4
4. Create a Black & White adjustment layer.
5. Adjust the Exposure adjustment layer settings to bring back details.
6. Create a composite by pressing Ctrl + Shift + Alt + E.
7. Name this layer Composite and position the layer on top.
8. Turn off the Composite layer and Face layer visibility.
9. Select the Hands layer and make a copy with Ctrl + J.
10. Change the blending mode to Darker Color and create a composite by pressing Ctrl + Shift + Alt + E.
11. Name the layer Composite Hands and move it to the top.
12. Create an inverse mask on the Composite Hands layer by holding the Alt key and selecting the layer mask.
13. With the inverse mask selected, set the foreground color to white and select the brush tool. Set the hardness to 0, opacity to 100 and flow to 100.
14. Carefully brush on the inverse mask to bring back the details.
15. Experiment with brush sizes and different opacity settings.
16. Flatten and save!
Creating the Double Exposure effect in Photoshop CC 2019 is a piece of cake.
Leave a comment below if you have any questions.
Subscribe:
/ stephenkwiecinski
Share this video:
• Double Exposure In Photoshop CC 2019 ...
Get creative with the Digital Media Pocket Knife! I'll give you the tools to get the job done.
NEW VIDEOS, Weekly!
Subscribe and start creating!
/ stephenkwiecinski
Contact Stephen Kwiecinski:
/ stephenkwiecinskibiz
Send Your Swag:
Stephen Kwiecinski
1206 Fulton Avenue
Winthrop Harbor, IL 60096


