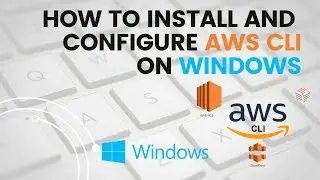
How to install and configure AWS CLI on Windows | AWS CLI on Windows | AWS Tutorials | #2
How to install and configure AWS CLI on Windows | AWS CLI on Windows | AWS Tutorials
Installing and configuring the AWS Command Line Interface (CLI) on a Windows operating system provides users with a powerful and efficient way to interact with Amazon Web Services (AWS) resources, manage cloud infrastructure, and automate various tasks. This comprehensive guide outlines the step-by-step process to seamlessly install and configure the AWS CLI, empowering users to harness the full potential of AWS services from their Windows environment.
Installation Steps:
Download the Installer: To begin, navigate to the official AWS CLI documentation (https://aws.amazon.com/cli/) and locate the section dedicated to Windows installation. Download the AWS CLI installer package for Windows, ensuring that you select the appropriate version compatible with your system architecture (32-bit or 64-bit).
Run the Installer: Once the installer package is downloaded, locate the executable file and double-click to initiate the installation process. A setup wizard will guide you through the installation steps.
Choose Installation Location: During installation, you will be prompted to select an installation location for the AWS CLI. You can choose the default location or specify a custom directory according to your preference.
Configure System Variables: To enable easy access to the AWS CLI from any Command Prompt window, opt to add the AWS CLI executable to the system's PATH environment variable. This step is crucial for executing AWS CLI commands from any directory on your system.
Configuration Steps:
Open a Command Prompt: After successful installation, open a new Command Prompt window to start configuring the AWS CLI.
Configure AWS Credentials: To interact with AWS resources, you need to provide your AWS access key and secret key. Use the "aws configure" command and follow the prompts to input your AWS Access Key ID, Secret Access Key, and default region. These credentials are securely stored in a configuration file.
Set Default Output Format: During configuration, you can specify your preferred default output format for AWS CLI commands. Common choices include JSON, text, and table formats. This setting determines how command outputs are displayed.
Testing Configuration: To verify that the AWS CLI has been properly configured, run a basic command such as "aws ec2 describe-instances." If configured correctly, you should receive a response displaying information about your EC2 instances.
Advanced Configuration and Usage:
Profiles: The AWS CLI allows you to set up multiple profiles, each with its own set of credentials. This is particularly useful when managing resources across different AWS accounts or environments.
Plugins and Extensions: AWS CLI offers a range of plugins and extensions that enhance functionality and allow interaction with specific AWS services. These can be installed and managed using the "aws configure set plugins" command.
Scripting and Automation: With the AWS CLI, you can create scripts and automate tasks, such as provisioning resources, managing security groups, and initiating backups. This capability streamlines workflows and reduces manual effort.
Sound Effect from: https://pixabay.com/sound-effects/?ut...
Hello everyone, on this channel you'll learn How to, Create and launch, Create and setup.
So stay tuned with my channel and like, subscribe, and shear my videos to other. I need your help to create more useful videos so keep suppourt my channel.
Thanks
#awstutorial #aws #awscli

![Complete online adult ballet center [30 minutes]](https://images.videosashka.com/watch/IgZEpRMQ-cE)