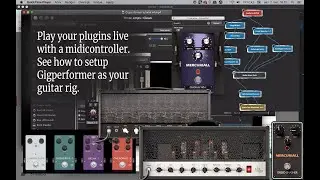
Learn how to setup Gigperformer as your main guitar rig
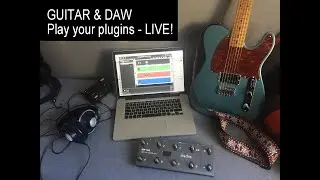
In this video I will show you how to setup amp and effects chains in Gigperformer and how to control them with your midicontroller.
I will show you two very different setups that both work:
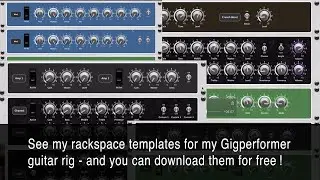
A. One setup with two rackspaces with different amps and effects.
B. One setup with a single rackspace that has three different amps routed through an audio mixer so you only hear one amp at a time.
Table of contents:
00:00 Welcome
00:05 Fire up Gigperformer 3
00:29 Setup first rackspace (Positive Grid Bias Amp 2 and a bunch of effects)
03:27 Setup second rackspace (Neural DSP Archetype:Nolly with own effects)
05:36 Tweak Rackspace 1 and create variations
06:40 Setup first rackspace panel for use with variations
08:39 Setup variations for rackspace 2
11:29 Test variations
12:10 New setup: One rackspace with 3 amps and audio mixer
12:35 Add amps and pedals
14:26 Start making connections
15:44 Add audio mixer to control which amp is active
16:11 Make changes to bus layouts
17:55 Setup rack panels
18:10 Create rack panel for amp switching
20:30 Tweak amps and effects
20:53 Test amps
21:13 Add panel for delay effects
23:42 Test delay panel
25:45 Add chorus pedal for modulation
26:32 Add chorus to rack panel
27:30 Test the four variations with midi controller
28:55 Setting up cc comands to turn effects on/off without program change
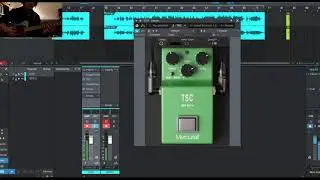
The plugins in use are:
Neural DSP Archetype:Nolly for amp sims and effects
Mercuriall Greed Smasher for overdrive
Mercuriall WS-1 for chorus
Valhalla DSP Supermassive for reverbs and delays
Audio Damage Roughrider for compression
Links:
https://gigperformer.com/
https://neuraldsp.com/
https://mercuriall.com/
https://valhalladsp.com/
https://audiodamage.com/