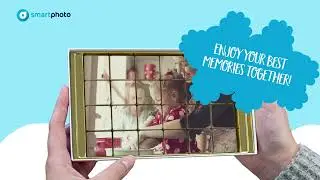
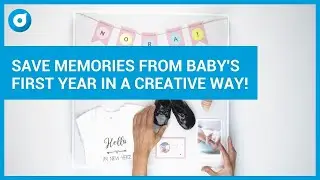
Baby shadow box - Turn newborn keepsakes into art!
Baby shadow boxes have become really popular, and we understand why. Instead of putting all the wonderful keepsakes of your child's birth and first year of life away in a drawer, you can enjoy them as a beautiful decoration for your home. At smartphoto.ie, you can easily develop the memories that you want to use for the box. Watch the DIY video or read the full description on how to create your baby shadow box below or on Smartphoto's blog.
📌 This is what you need: 📌
▹ A frame with a depth of about 5 -10 cm
▹ Fabric or wallpaper for the background
▹ Glue gun
▹ Hemp string for hanging items
▹ Hooks or clamps for attaching other items
▹ Thicker paper to create mini pennants with the baby's name - a lovely touch
💡 Examples of things you can fill your board with:
▹ Ultrasound image - maybe developed on luxury photo paper ▹https://bit.ly/3jrGNHY
▹ Photo of the baby bump, and the first picture of the baby - for example, a photo strip with three pictures: the ultrasound picture, a photo of the bump, and the first picture of the baby ▹ https://bit.ly/3hnuABs
▹ Sticker - to show the baby's birth weight and height ▹ https://bit.ly/362o3qw
▹ Name tag - a decorative way to display the child's name ▹ https://bit.ly/2SIFNEq
▹ Round stickers for the mini bunting (one sticker per letter in the child's name) ▹ https://bit.ly/2TgBz7l
▹ Birth announcement - for example, one of these adorable designs ▹ https://bit.ly/36jhu3b
▹ First baby onesie - did you know that you can create your own design at Smartphoto? ▹ https://bit.ly/3dxlz7z
▹ First booties
▹ Baby's hospital bracelet
▹ A nap
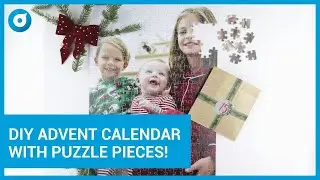
💡 For a more detailed description of how to make this cute Baby shadow box, read our step-by-step guide in the blog: https://bit.ly/3hehlUZ
♡ Smartphoto.se - We help you make beautiful things with your photos! ♡

![ETF Come Investire? I 3 ETF MIGLIORI Per PIANO DI ACCUMULO! [GUIDA X PRINCIPIANTI]](https://images.videosashka.com/watch/qewj3E7bxhA)