Using Glass material in Window design in Autocad
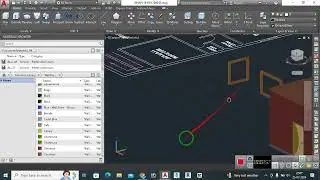
To apply a glass material to a window design in AutoCAD, follow these steps:
1. *Switch to a 3D View:*
Ensure you are working in a 3D workspace (e.g., "3D Modeling" workspace).
2. *Create or Select the Window:*
Design the window frame and panes as 3D solids, or select the existing 3D window objects.
3. *Open the Materials Browser:*
Type `MATERIALS` in the command line and press Enter, or go to the "Visualize" tab and click on "Materials Browser."
4. *Add a Glass Material:*
In the Materials Browser, find a pre-existing glass material or create a new one:
To use a pre-existing material, scroll through the list or use the search function to find "Glass."
To create a new glass material, click on the "Create Material" button (usually a plus sign), select "Glass" as the base material, and adjust the properties (color, transparency, reflectivity, etc.) as needed.
5. *Assign the Material to the Window:*
Select the glass material in the Materials Browser.
Apply it to the window panes by dragging and dropping the material onto the selected objects, or right-click on the material and choose "Assign to Selection."
6. *Adjust Material Properties (if needed):*
Click on the material to edit its properties, such as transparency, reflection, refraction, and color, to achieve the desired glass appearance.
7. *Render the Scene:*
Use the `RENDER` command to see a realistic preview of your window with the glass material applied. Adjust lighting and view settings as necessary to enhance the appearance.
By following these steps, you can effectively apply a glass material to your window design in AutoCAD, enhancing the realism of your 3D models.This channel is basically for Engineers, Architects, Designer and other creative people who want to EXCEL in field of autocad and other designing software. this


