How to Fix External Hard Disk/USB/HDD is Not Accessible| Folder Access Denied|Access is Denied Error
To recover any data from external hard drisk that shows folder access denied error, free download 4DDiG: https://bit.ly/3llA9WO
📌Timestamp
Video Intro 00:00
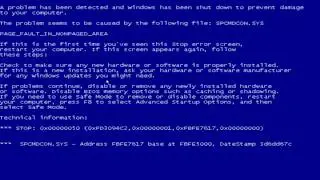
What Cause Access is Denied Error? 00:34
How to Fix External Hard Disk/USB/HDD is Not Accessible Error? 01:10
Method 1: Correct the Privilege Settings in Windows 01:31
Method 2: Run CHKDSK Command to Check Disk Error 02:35
Bonus Tip: How to Recover Files from External Hard Disk/USB/HDD that Shows Inaccessible Error? 03:36
How to Fix External Hard Disk/USB/HDD is Not Accessible Error?
👉Method 1: Correct the Privilege Settings in Windows
First is by providing correct privilege settings in Windows
If you don’t have the correct privilege in Windows, even then you might get this error. To fix this issue, you need to take the ownership. To do this:
Go to My PC and ight click on the inaccessible hard drive. Then click on properties-security tab-advanced. Besides owner, click on the change button.And again, click on Advanced. Now, click on Find now and search for everyone, and click on OK. Finally close the pop-up boxes.
Now try to access your drive. If you’re able to access it, then congratulations but if not then try the following methods.
👉Method 2: Run CHKDSK Command to Check Disk Error
Another possible reason for this problem is disk errors, bad sectors, or a corrupt file system. To fix this, you’ll need to run the check disk command. To do this, you need to first connect your external drive and click on start and search for ‘cmd’. Now right click on it and click run as administrator.
Here in the command prompt window, type chkdsk D: /f /r. (Here, D is the drive’s letter that is showing us the error. So, for you this might be different ). Now press the enter key
Now try to access the drive, and it should work for you.
Bonus Tip: How to Recover Files from External Hard Disk/USB/HDD that Shows Inaccessible Error?
If those above methods didn’t work for you, then the ultimate solution is to recover all your data from the drive and reformatting it which will fix the drive for sure. Now, for this data recovery we’ll be using the best data recovery software that is available right now in market which is nothing but Tenorshare 4DDiG.
4DDiG is a powerful data recovery software that supports both Windows and Mac, and its fast update make 4DDiG functions more and more powerful. 4DDiG can recover data from both internal and external devices, including PCs, USBs, SD Card, external hard drives, digital cameras, etc. Besides, it supports many different scenario data recoveries, including accidentally deleted, system crash, formatted, lost, corrupted, and so on. It can also recover over 1000+ different file types, such as photos, documents, audio, etc.
So, download 4DDiG from the official website or check the video description to get direct download links.
After installation, plug in your external drive and run 4DDiG. Next, select your drive and click on scan. Select the file types that you want to recover. I’d suggest you to scan all file types.
Now 4DDiG will scan your corrupted drive for your lost data. This process takes a bit of time, so, I’d suggest you to enjoy a cup of coffee while you wait.
Alright, now select the folders or files that you want to recover. And click on the recover button.
After that select the location where you want to paste in your recovered data and finally click on recover.
Wait for some time again. Okay, so we have successfully recovered our files from the drive. To view the recovered files, click on View recovered.
Now, as we have recovered our important files, we can format our drive and fix the issue.
In this way you can fix external hard disk/USB/HDD showing not accessible error.