Learn Adobe Photoshop - Shape Tools - Finalizing and Combining Your Mask
Check out Bas Rutten's Liver Shot on MMA Surge: http://bit.ly/MMASurgeEp1
Mahalo expert Justin Z. gives a tutorial on finalizing and combining your masks in Photoshop.
About Finalizing and Combining Your Mask
---------------------------------------------------------------------
This tutorial is a continuation of subtracting from your mask. Here you will learn how to cover the other side of the bottle and combine all these shapes into one, simple path.
Finalizing and Combining Your Mask
---------------------------------------------------------------------
1. Press the "A" button and select the largest rectangle that you have already created. Control/Command + T to Transform it. Click one of the rectangle's four corners and drag it so you shrink the rectangle down to where the circle meets the uncovered area. Press Enter to finish your shape.
2. Now you will want to take the circle and other rotated rectangle and flip them over to the mirror-image side of the bottle so you don't have to recreate them from scratch. Press "A" and click on the circle. Hold down Shift and click on the rotated rectangle -- now both shapes are selected. Press Control/Command + Option + T to transform and duplicate the objects.
3. You want the point of origin to be in the middle of the bottle, otherwise they will flip horizontally but they will be in the same area. Click and hold on the point of origin (tiny x in the middle of both shapes) and hold Shift. Drag the point into the center of the bottle's neck where it meets the body (let go of the mouse before Shift so the positioning is more accurate).
4. Right-click on the shape and a Free Transform window will pop up. Click on Flip Horizontal, second from the bottom, and the shapes will be copied over as a mirror-image from one side to the next. Press Enter and, if necessary, click and drag each shape to get them as perfectly positioned as you can. Accidentally pressing Return will make the shapes disappear, but if you press Enter again they will reappear.
5. To combine all the shapes into one
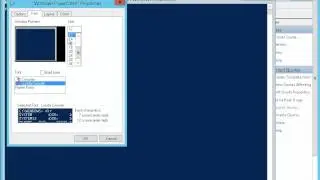
mask without losing your work, you will need to backup this path. Go to Paths in the panels, then click and drag Bottle Vector Mask down to the tiny page icon at the bottom and it will create a duplicate. Double-click on it so you can rename it (in this example, "Bottle Path").
6. Click on the original mask path ("Bottle Vector Mask") because if you change the newer path, you cannot change the older one. Click Combine in the top Options Panel and you get one, simple mask.
Read more by visiting our page at:
http://www.mahalo.com/learn-adobe-pho...
