How to Make ADVANCED Call-out Titles+Preset! // After Effects Tutorial!
⬇️DOWNLOAD UPDATED VERSION HERE⬇️
http://bit.ly/FLEX-Callout-Titles
►▶Full animated bundle for editors currently on special: https://bit.ly/EditingElementsAEJuice
🎥 How to make advanced Call-out Titles in After Effects! Track your title seamlessly into your shot! I am also giving you guys a preset so you can save time and it is so simple and easy to use!
The tutorial starts at 5:40
You will learn how to use the pick whip tool, parent effects, use expressions, and much more! You can use this for lower thirds for your videos or highlight something in your shots. One of the coolest things you will learn is tracking the call-out title into your video and have the title follow your subject!
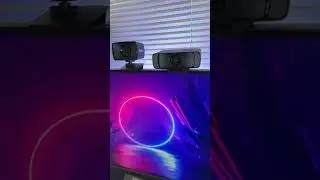
The Circle
Composition : 24 fps
1. 5:45 Use Ellipse tool (make circle) (size 95,1)
2. 5:50 Set anchor point to center (ctrl + double click pan behind)
3. 5:55 Expand ellipse 1 - select ellipse path 1 - add ellipse. Ellipse path 2 size 73
4. 6:10 Select ellipse path 2 - add merge path - expand - mode (subtract)
5. 6:20 Add ellipse - drag bellow "merge path" - expand - size 38
6. 6:38 Time Ruler to 00:09 - click time stop watch - size 0 (After step 9 he will move 00:07 to 00:09)
7. Time Ruler to 00:14 - size 42
8. Time Ruler to 00:16 - size 29
9. Time Ruler to 00:18 - size 38
10. 7:32 Block 3 key frame - right click - key frame assistant - ease ease (or press f9) (make sure select size bellow ellipse path 3
)
10. 7:42 Click Graph editor
11. 8:30 Time Ruler 00:10 scale 108, 12 scale 95, 14 scale 100, ease ease
12. 9:05 Click Graph editor
13. 9:32 Make New Layer - Click Layer - new layer - solid
14. 9:35 Effect and presets - beam - drag to layer
15. 9:38 Length 100, softness 0 , color white white
16. 9:52 Rename Line 1, duplicate (ctrl c, ctrl v)
17. 10:01 Create null object (right click - new - null object)
18. 10:05 Rename start, duplicate, rename "Elbow", duplicate, rename "End
"
19. 10:21 Expand Line 1 - Expand Effects - Expand Beam
20. 10:30 Block Start, Elbow, End (hold shift and click 1 by 1) then press p
21. 10:39 Select Starting Point (Step 19) - hold alt - Click Stop Watch - Hold click "expression pick whip" to "Start Position"
22. 11:05 Select Ending Point (Step 19) - hold alt - click stop watch - Hold click "expression pick whip" to "Elbow Position
"
23. 11:29 Repeat Line 2 - Starting point to Elbow
24. 11:43 Repeat Line 2 - Ending Point to End
25. 11:54 Center the anchor point (step 2)
26. 12:07 Lock Line 1 and 2
27. 12:14 Rename Shape Layer 1 Into "Circle"
28. 12:17 Grab the circle to the center of the start
29. 12:25 Expand Circle - Position - step 19 to start position


![[FREE FOR PROFIT] Три дня дождя x МУККА type beat | Pop punk type beat -](https://images.videosashka.com/watch/xdqqIm7zulU)