Reading Digital Inputs | Raspberry Pi Pico Workshop: Chapter 2.4
🔗 The full course : https://core-electronics.com.au/cours...
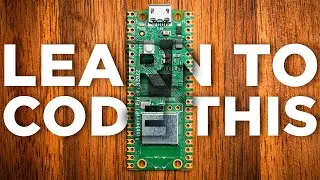
In this video, we will learn how to use digital inputs on the Pico through 2 examples. In the first, we will be reading the state of a button*, and in the second we will *control an LED with a button. We will also look at the relationship between voltage and digital input state.
🔧🔨🧰 Hardware featured in this guide:
Pico:
https://core-electronics.com.au/catal...
LED Pack:
https://core-electronics.com.au/catal...
Breadboard:
https://core-electronics.com.au/catal...
Jumper Wires:
https://core-electronics.com.au/catal...
Button Pack:
https://core-electronics.com.au/catal...
Potentiometer:
https://core-electronics.com.au/catal...
💡❓ If you have any questions about this content or want to share a project you're working on head over to our maker forum: http://coreelec.io/forum
0:00 Digital Inputs on the Pico
0:49 Digital Input Example Code
4:07 Exploring Pin Voltage and Digital Reading
5:16 Digital Inputs
6:56 Button and LED example
8:27 What can you do with this?
9:45 3 Key Takeaways
🌏🦘 Core Electronics is located in the heart of Newcastle, Australia. We're powered by makers, for makers. Drop by if you are looking for:
• Raspberry Pi https://core-electronics.com.au/raspb...
• Arduino https://core-electronics.com.au/ardui...
• Sparkfun https://core-electronics.com.au/brand...
• Adafruit https://core-electronics.com.au/brand...
• Pololu https://core-electronics.com.au/brand...
• DFRobot https://core-electronics.com.au/brand...
The following trademarks are owned by Core Electronics Pty Ltd:
"Core Electronics" and the Core Electronics logo
"Makerverse" and the Makerverse logo
"PiicoDev" and the PiicoDev logo
"GlowBit" and the GlowBit logo



![|СОВМЕСТКА| Это любовь в одно касание... [with Ohiko Tyan]](https://images.videosashka.com/watch/inx2Welh5M0)


